Take Attendance at DSS/ADC
This topic explains how to use Pavillio to record and manage attendance for individuals in Day Support Services (DSS) or Adult Day Care (ADC) settings. Learn to track attendance and transportation for group-based services where staff support multiple individuals.
Before getting started, make sure that you have assigned the DSS/ADC location to the appropriate Clients. For more information, see Assign Attendance Location.

To capture attendance and transportation:
-
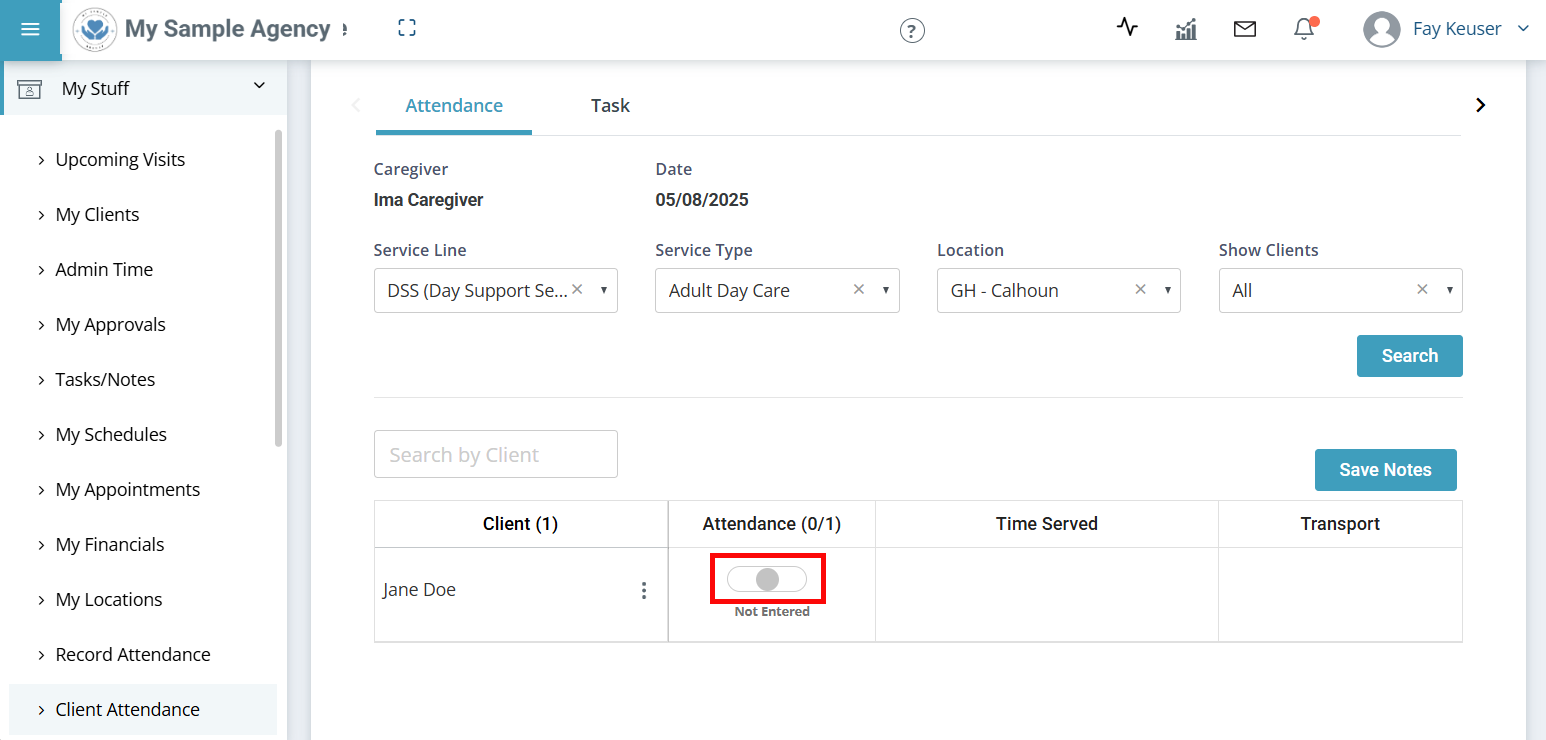
Go to My Stuff > Client Attendance.
-
On the Attendance tab:
-
Select the Service Line.
-
Select the Service Type.
-
Select the Location.
-
Click Search.
-
Find the Client's name.
If the Client is not on the list, make sure that the Service Type and Location are correct. Otherwise, reach out to your supervisor to make sure they are added to the list.
-
To mark the Client as present, click to the right of the Attendance toggle. To mark the Client as absent, click to the left of the Attendance toggle.
-
After marking the Client as present, click the + under the Transport column to add the number of transport trips. Click the Update button.

-
You can add notes to the attendance record by typing them into the Notes text box, and then clicking the Save Notes button. View the notes by clicking the Information icon.

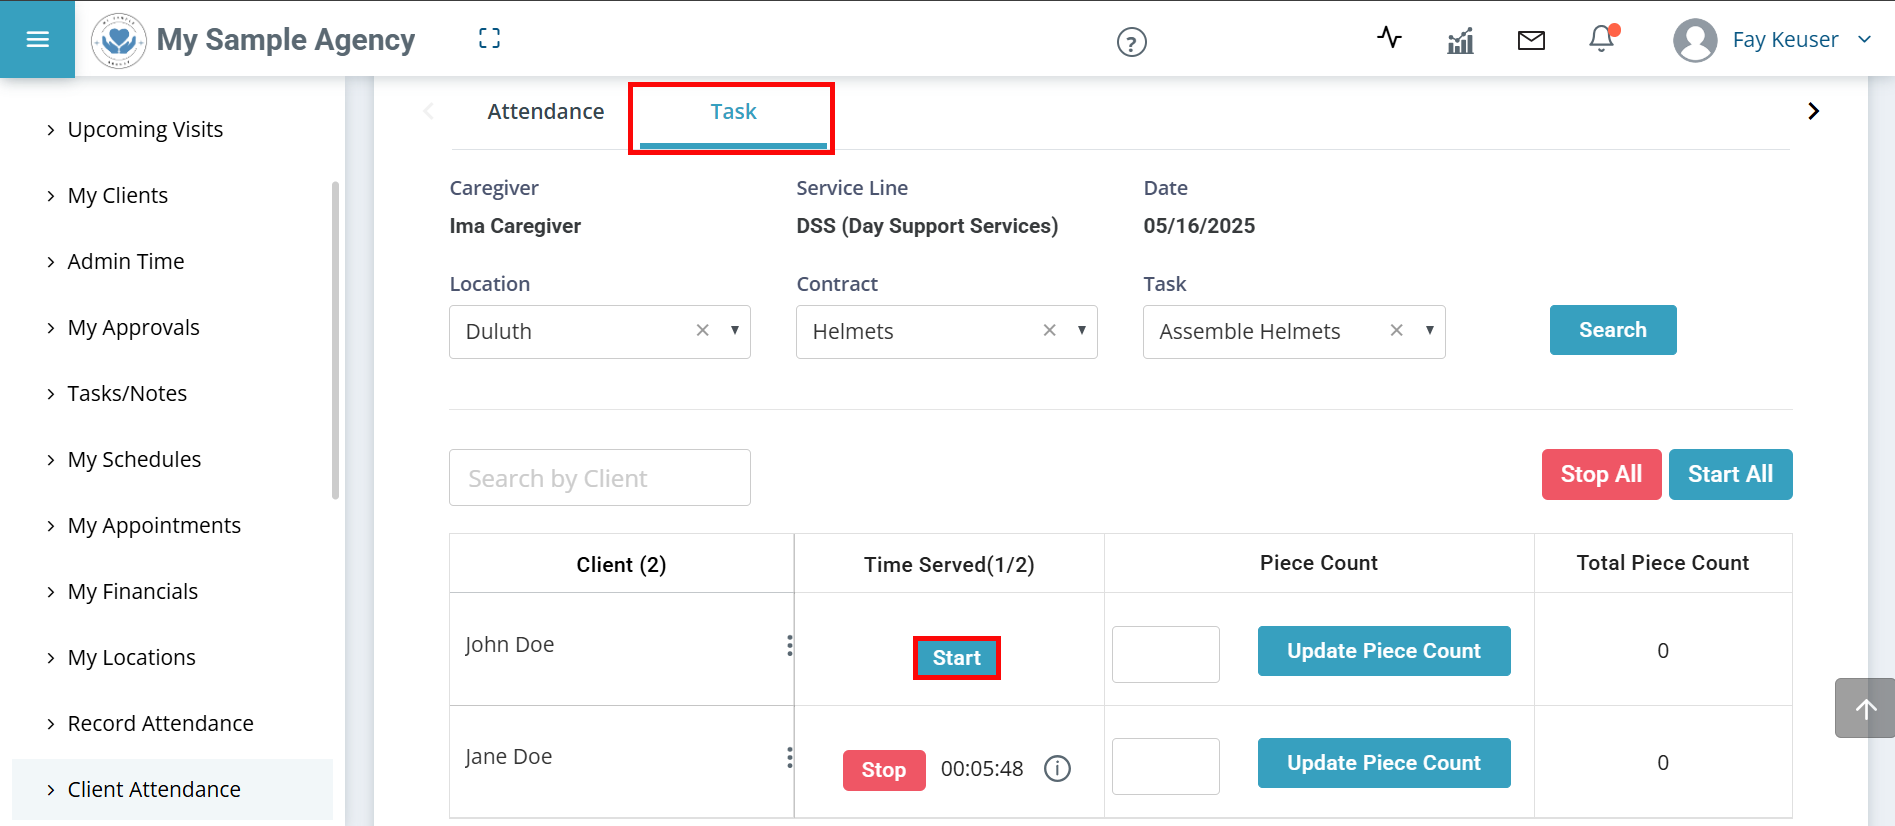
Individuals cannot be clocked into multiple tasks, if clocked into a task and the DSP tries to clock the individual into another task, Pavillio asks them to confirm stopping the current task. They must click OK to start the new task.
-
-
Click the Clock Out button at the end of the day or as needed. The record is automatically submitted.
-
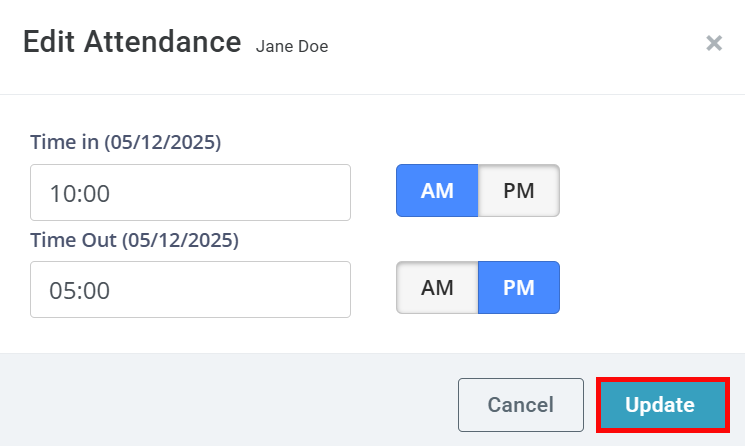
To edit a clock in or clock out time, click the Information icon.

It is best practice to review attendance and trips that were submitted prior to a supervisor approving the records for sending claims.
To review submitted attendance and transportation:
-
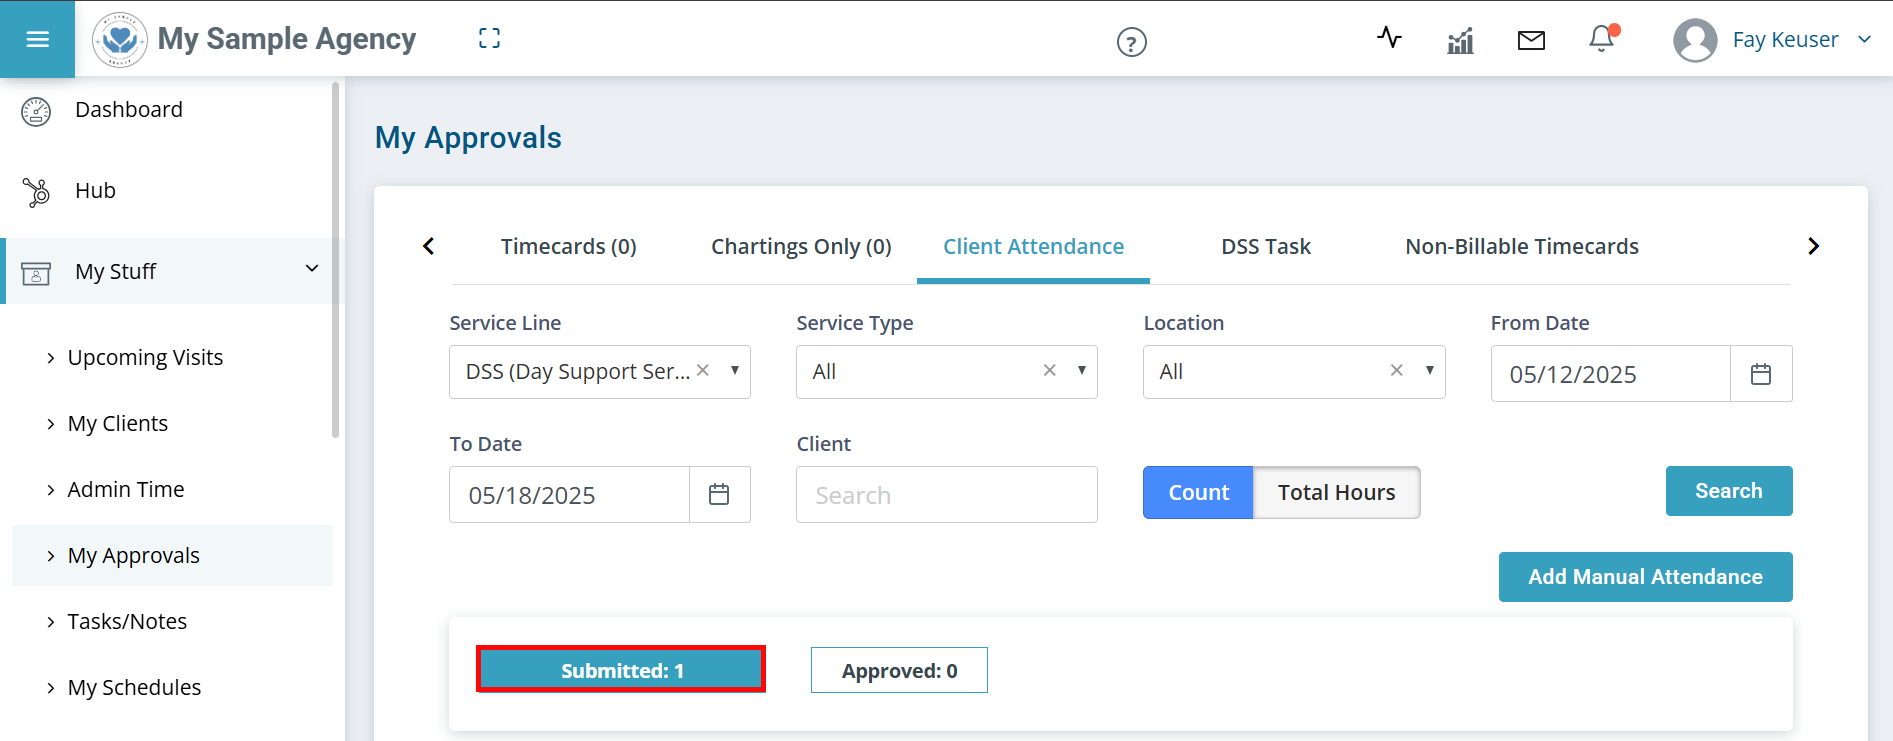
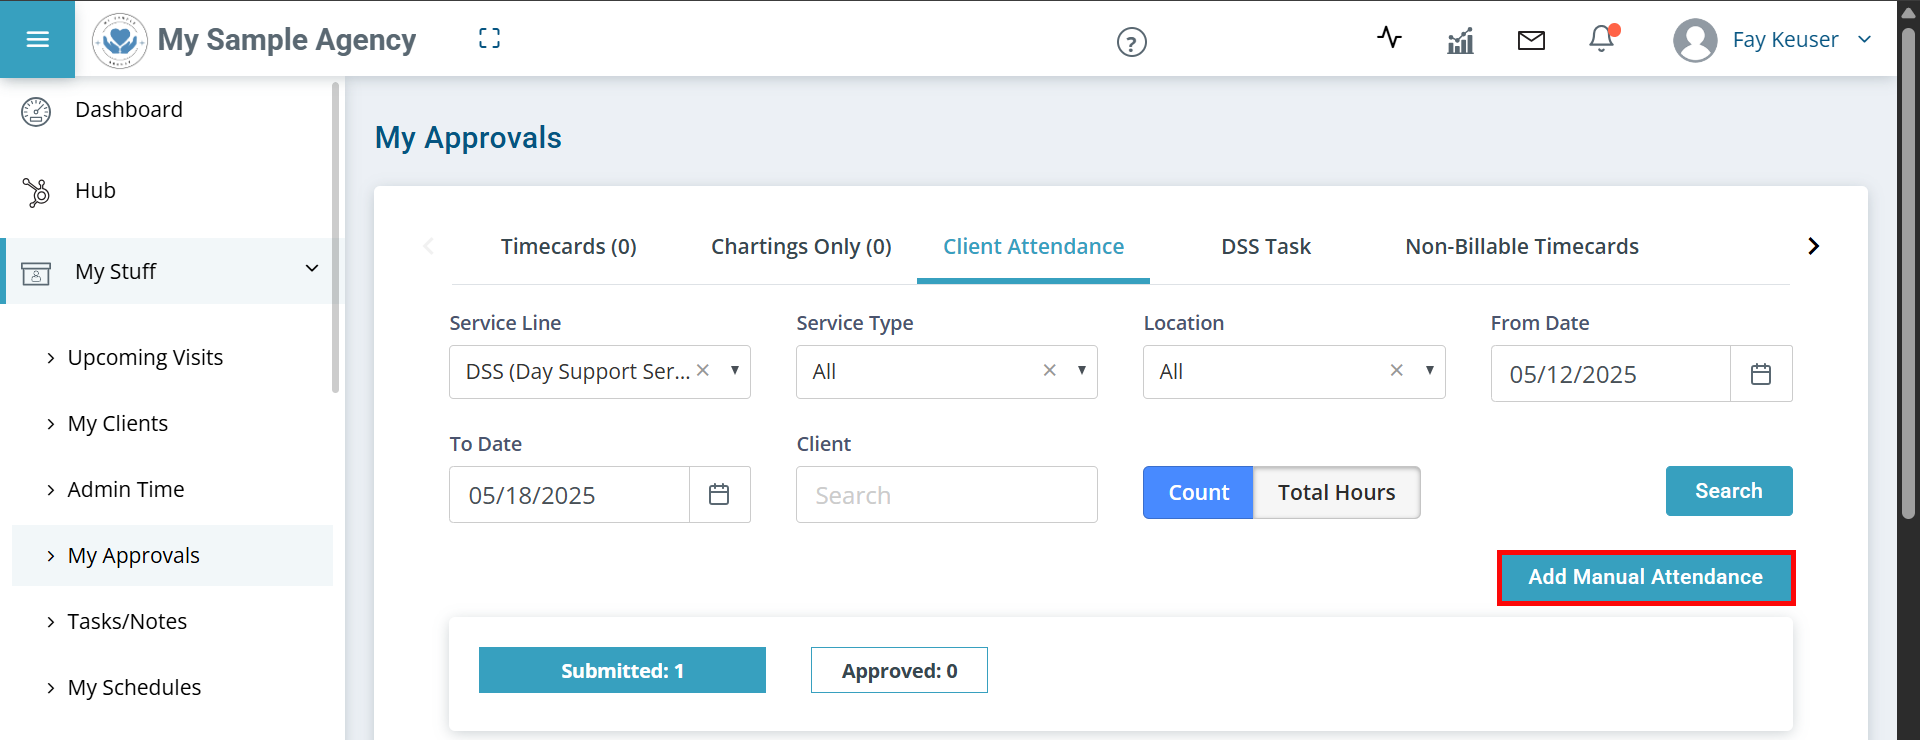
Go to My Stuff > My Approvals > Client Attendance.
-
Select a Location, From Date and To Date from the dropdowns.
-
Click Search.
-
Click the Columns button and select Served Hours and Transport to add those columns to the table.
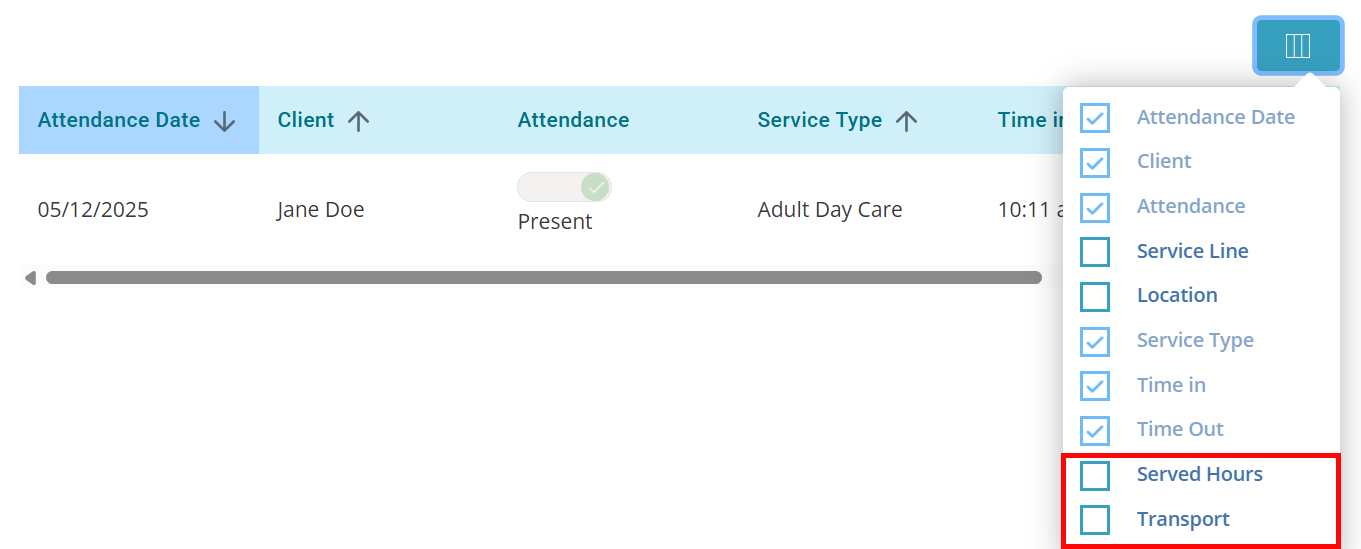
- Review the Served Hours and Transport data for each Client.
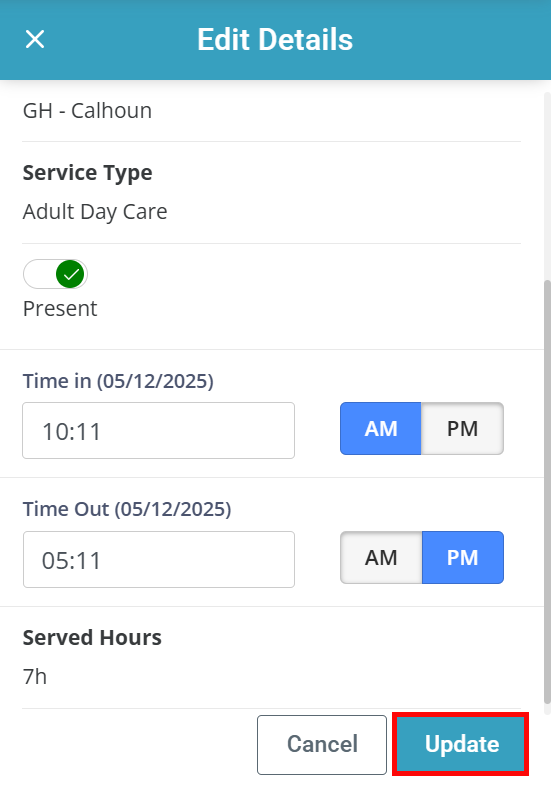
- If a record needs to be adjusted, click the Edit icon under the Actions column at the end of the record.

Records remain in the Submitted card until a supervisor approves the records from the Care Management > Approve Attendance page.

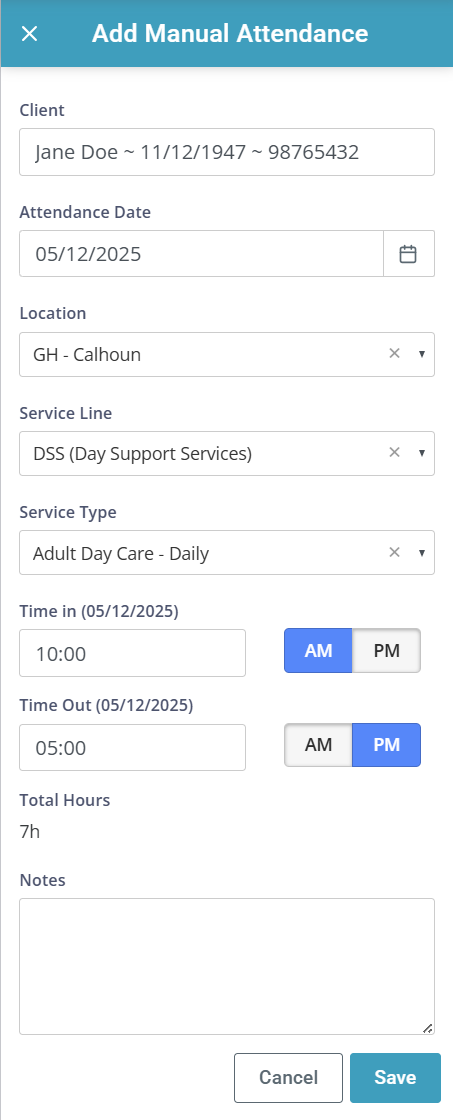
In some cases, you may need to enter an attendance or transportation record that wasn’t captured on the day-of.
To manually enter attendance and transportation:

Employment Services help individuals gain work experience by supporting them at community-based jobs.

To clock in an individual for employment services:

Click Stop All and then click Confirm in the popup window.
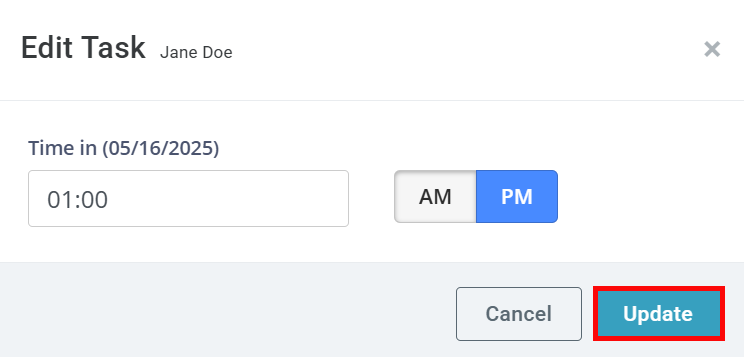
To edit real-time clocking in/out time:
-
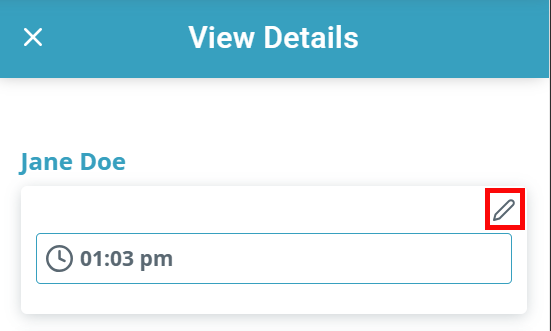
Locate the individual. Under Time Served, click the i icon.
-
The View Details panel opens. Click the Edit next to the time you would like to change.
-
In the Edit Task window, enter the correct time, adjust AM and PM if necessary.
To manually edit Task Time or Piece Counts:
-
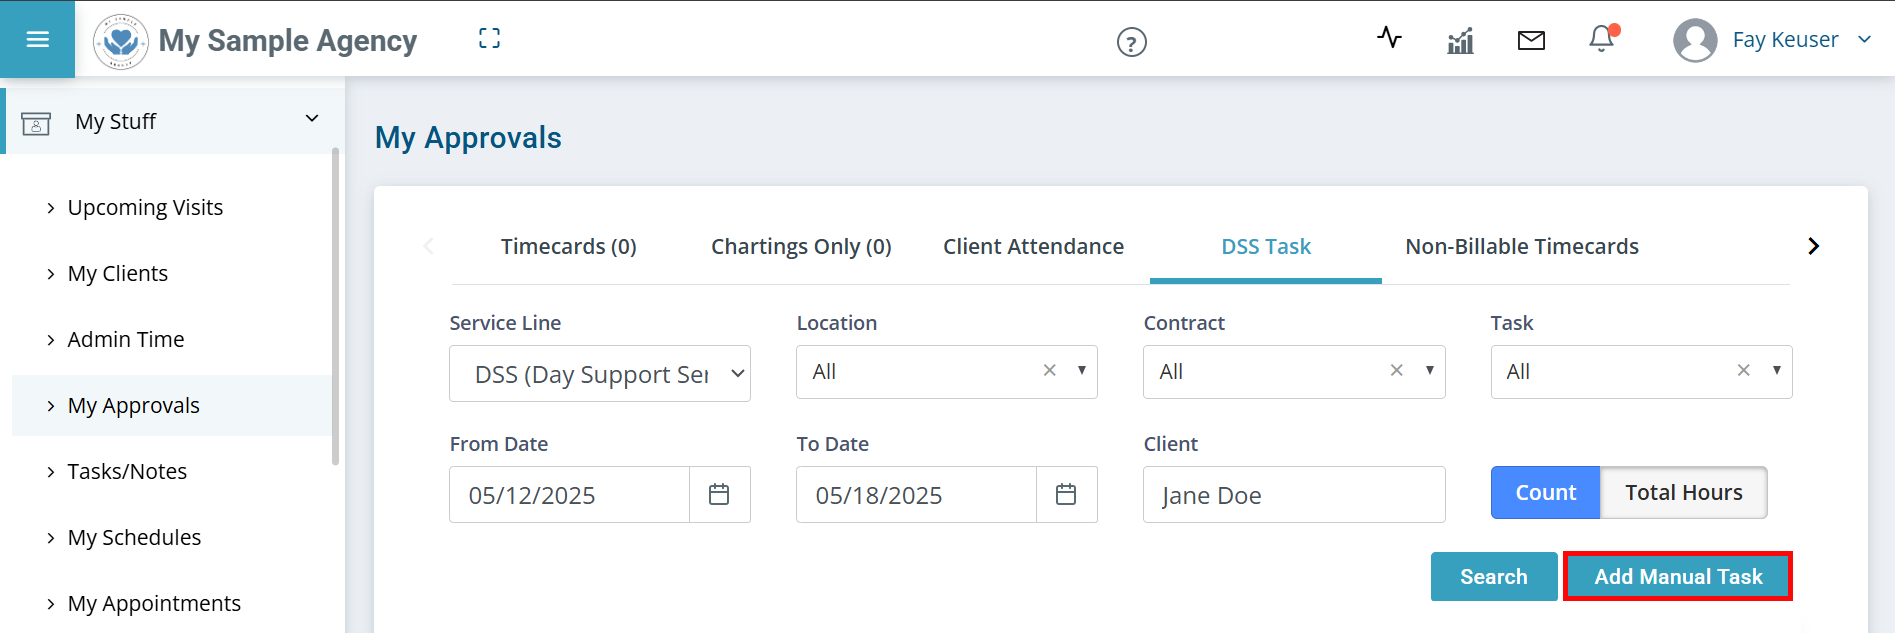
Go to My Stuff > My Approvals > DSS Task.
-
Filter for the records you would like to edit. Under the Actions column, click the Edit icon.

-
The Edit Details panel opens. Correct the data for Task, Service Date, Start/Stop Times, or Piece Count.
-
Click the Update button.
To manually enter Task Time or Piece Counts:
Remember that the individual must have an attendance record in order to enter a Task record.
-
Go to My Stuff > My Approvals > DSS Task.
-
The Add Manual Task panel opens. Search for and select the Client name, Service Date, Location, Contract and Task.
-
Enter the Start Time and End Time.
-
Verify that the Served Hours are correct
-
If applicable, enter the Piece Count and Notes.
-
Click the Save button.
Other Resources
