Masters Configurations
Use the Configurations feature under Administration > Masters > Configuration to set specific thresholds and settings to meet your Agency's needs. The options include colors, language, time zone, certification period, and more. For example, you can change the time zone from America/Chicago to America/Denver.
Changes in the Configurations feature change data for the entire agency.

Here are some configurations changed by most agencies.
-
Acceptable Distance (In Meters) between Client Location and Service Delivery Location: The distance in meters to set the Geofence for the EVV app clocking in and out. Caregivers must be within the Geofence to clock in without the user receiving an alert and the visit falling under the Warning card in Approve Visits.
-
Allow Override for Clients: The Client Override feature allows certain restrictions to be overridden. Setting this Configuration to No removes the ability to turn on overrides in the Client Profile.
-
Default Date Format for Display: Determines the date format throughout Pavillio.
-
Default Language: Allows you to choose a different language throughout Pavillio for everyone.
-
Default Time Zone: Allows you to change the time zone throughout Pavillio for everyone.
-
Default grace period (In minutes) for clock in with respect to the scheduled time: If using schedules the grace period is the number of minutes to the start and end times for acceptable clocking in or out.
-
Define background color codes for application statuses: Allows you to decide the appropriate colors for New, Offer, Accepted, etc.
-
Display Agency Name: Causes your agency name to display in the upper left-hand corner near the logo.
-
Display time in 12 hour or 24-Hour format: Allows you to decide how time displays throughout Pavillio.
-
Enable Fax: When set to Y enables the ability to send Faxes from profiles or the Hub.
-
First Name and Middle Name, Last Name or Last Name, First Name and Middle Name: Determines how names appear in dropdown lists throughout Pavillio.
-
Monthly Interest (In Percentage) Charged on Unpaid Amount. Default = 0: Interest charged to clients on deductible and spenddowns.
-
Number of entries to be displayed per page on UI: Allows you to determine how many records are displayed on a page. The higher the number the longer it takes the pages to load.
-
Rate Factor for All Employees: The setting for overtime calculation. The default is 1.5x.
-
Regular Working Hours Per Week: This is the threshold of hours that can be worked in a week before OT begins to calculate.
-
Start day of the Week: The day of the week that you want the payroll period to begin.
-
Support Community Care: Enables Community to be a selection when clocking in or out of a visit record in the Mobile app or My Stuff > My Clients.
-
The number of minutes after which an idle user is logged out:The threshold of how many minutes an idle user is logged out.
-
The maximum number of retries: Threshold of how many attempts a user can try to log into Pavillio before being locked out. This requires a support ticket to unlock the user’s profile.

To edit Configurations:
-
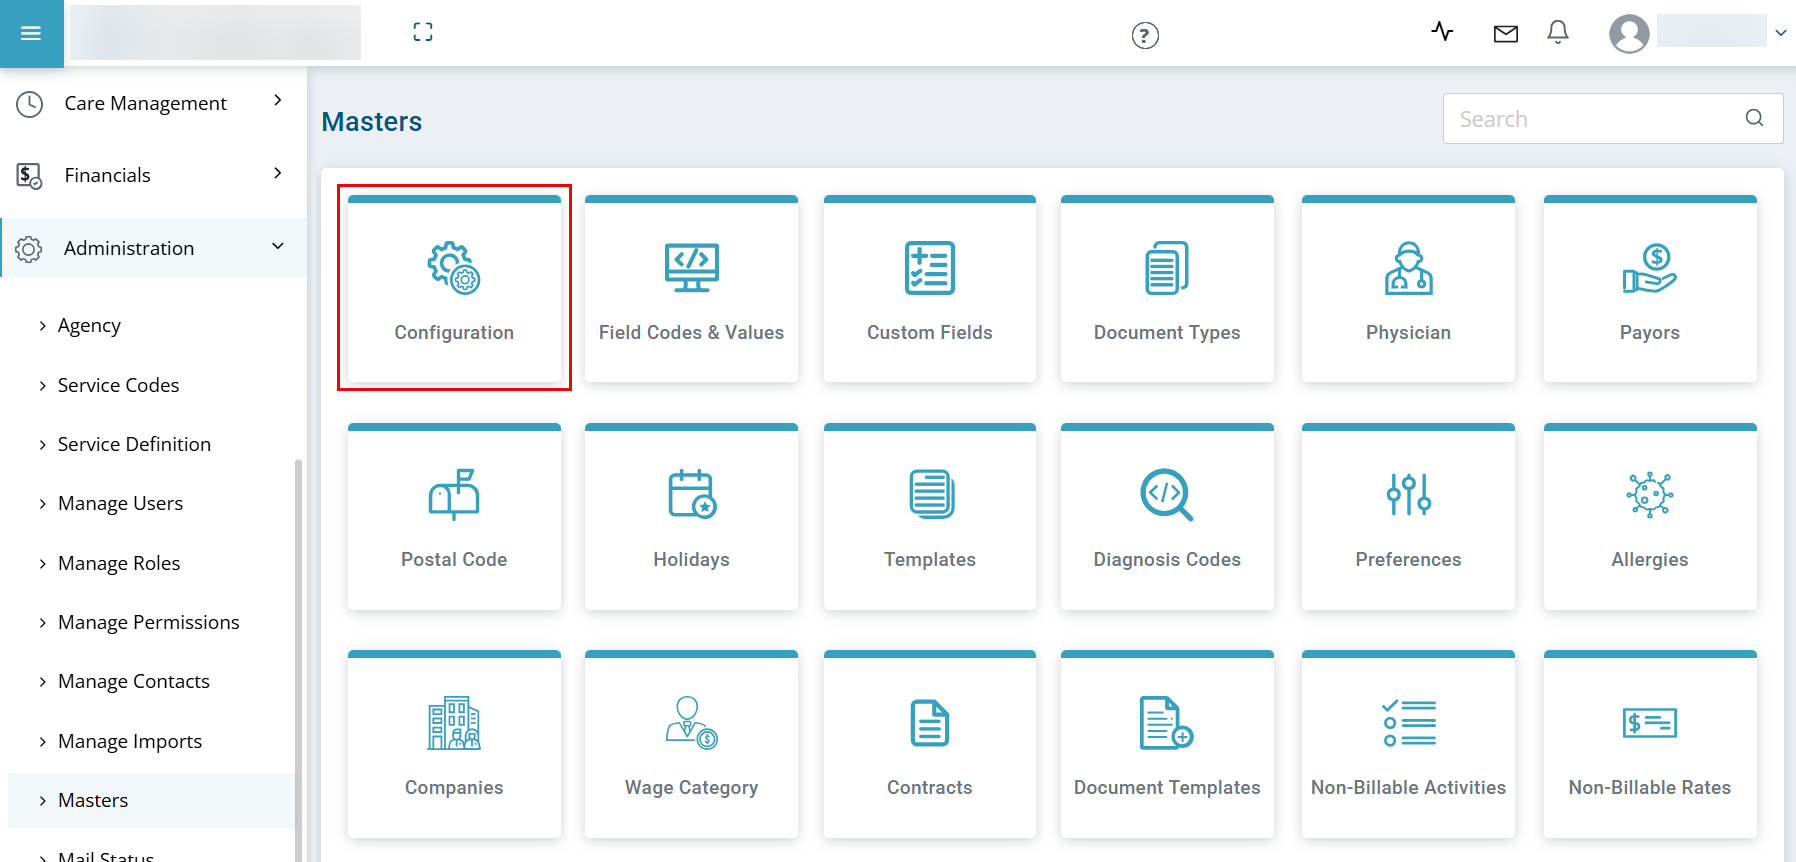
Go to Administration > Masters and then select Configuration.
-
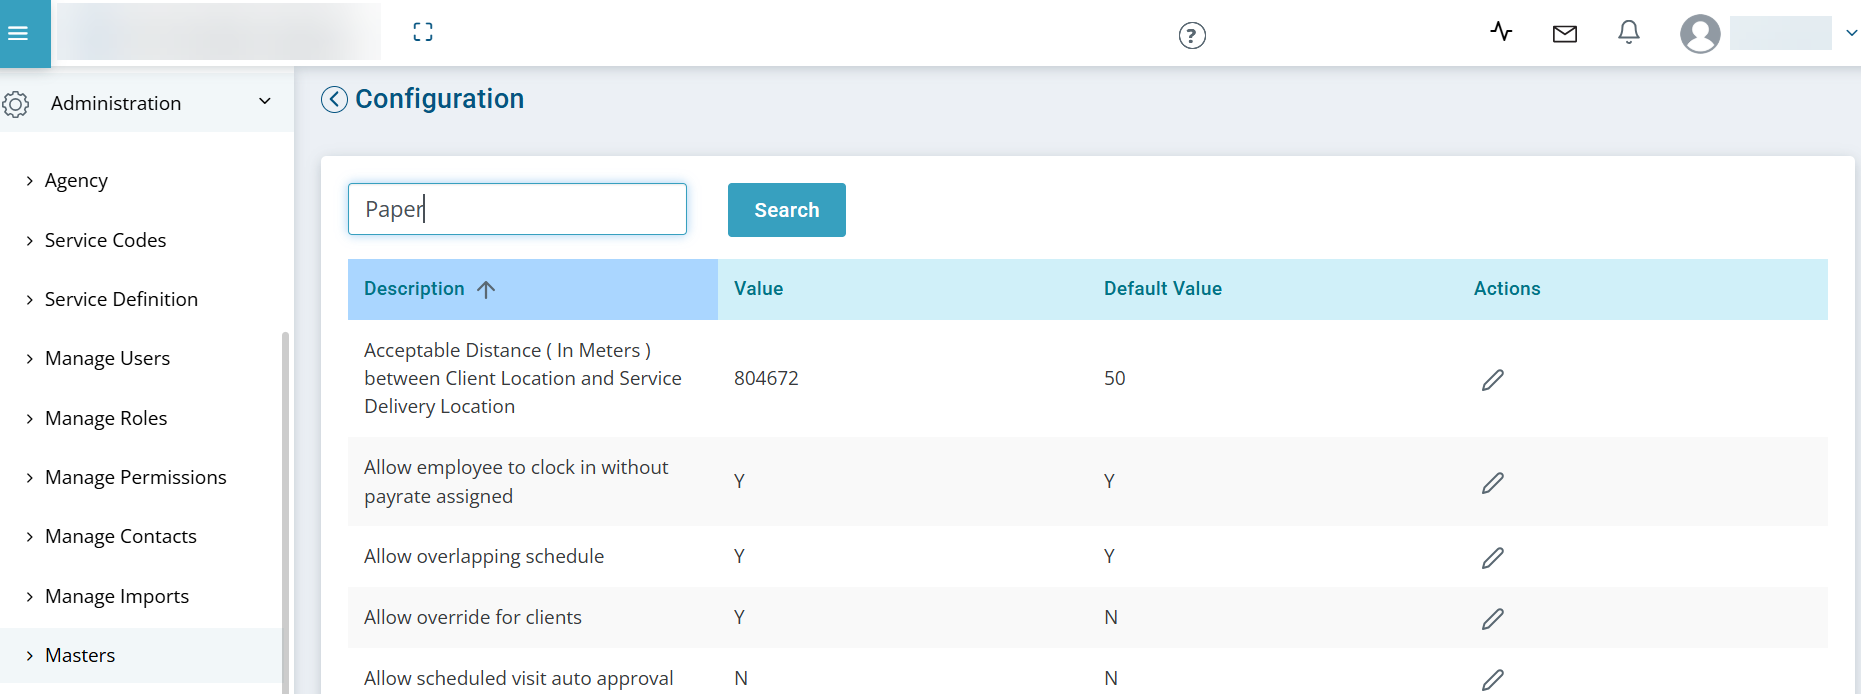
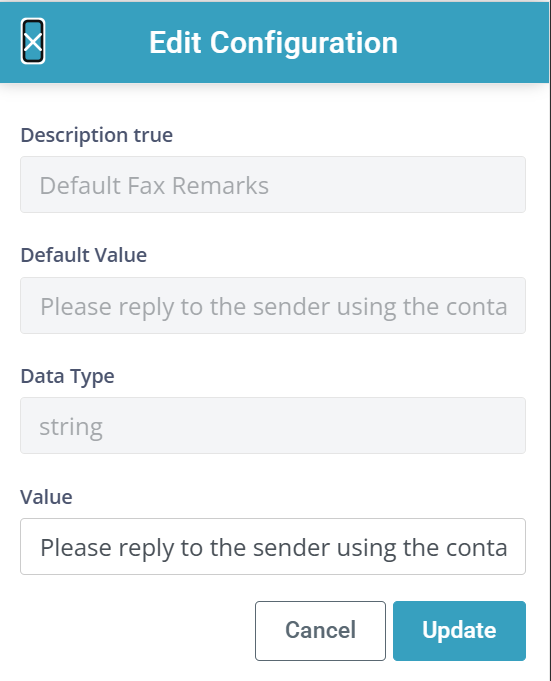
Search for the configuration you want to edit, and then select the Pencil icon under the Action column. The Edit Configuration window opens.
-
In the Value field:
-
Select Y for yes, this turns the configuration on.
-
The default value is N for no, this turns the configuration off.
-
-
Click Update. A message displays that the change is applied at your next login.
The next time you log into Pavillio, the configuration is applied.

The Community feature when activated allows the Caregiver to select Community as a service location at clock in or clock out. This allows the visit to start in other locations besides the Client's home. When this Configuration is set to Yes, Community becomes an option for all Caregivers to select.
To activate Community:
-
Go to Administration > Masters and then select Configuration.
-
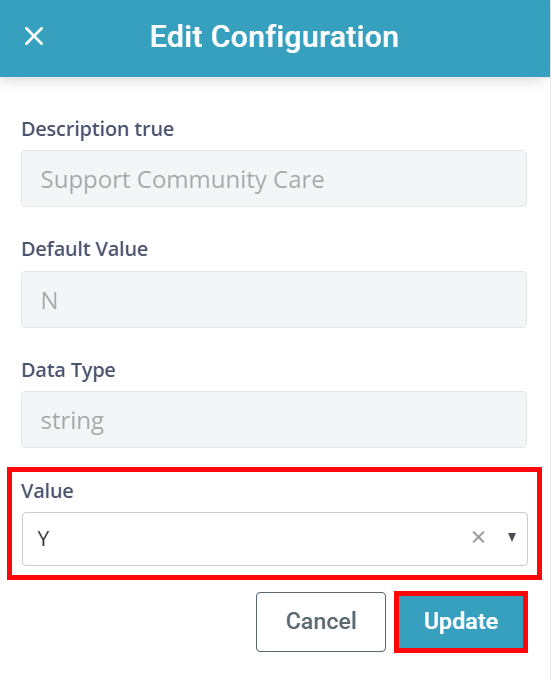
Search for Community or Support and locate Support Community Care. Select the Pencil icon under the Action column. The Edit Configuration window opens.
-
In the Value field,
-
Select Y for yes, this turns the configuration on.
-
The default value is N for no, this turns the configuration off.
-
-
Click Update. A message displays that the change is applied at your next login.
The next time you log into Pavillio, the configuration is applied.

The Outbound Fax feature is used to increase communications with external partners. To successfully fax from Pavillio, there are a few settings to set for your agency.
If you don't have access to Configurations, contact your internal Agency Admin to enable faxing for your agency.
To enable Outbound Faxes,
-
Go to Administration > Masters > Configuration.
-
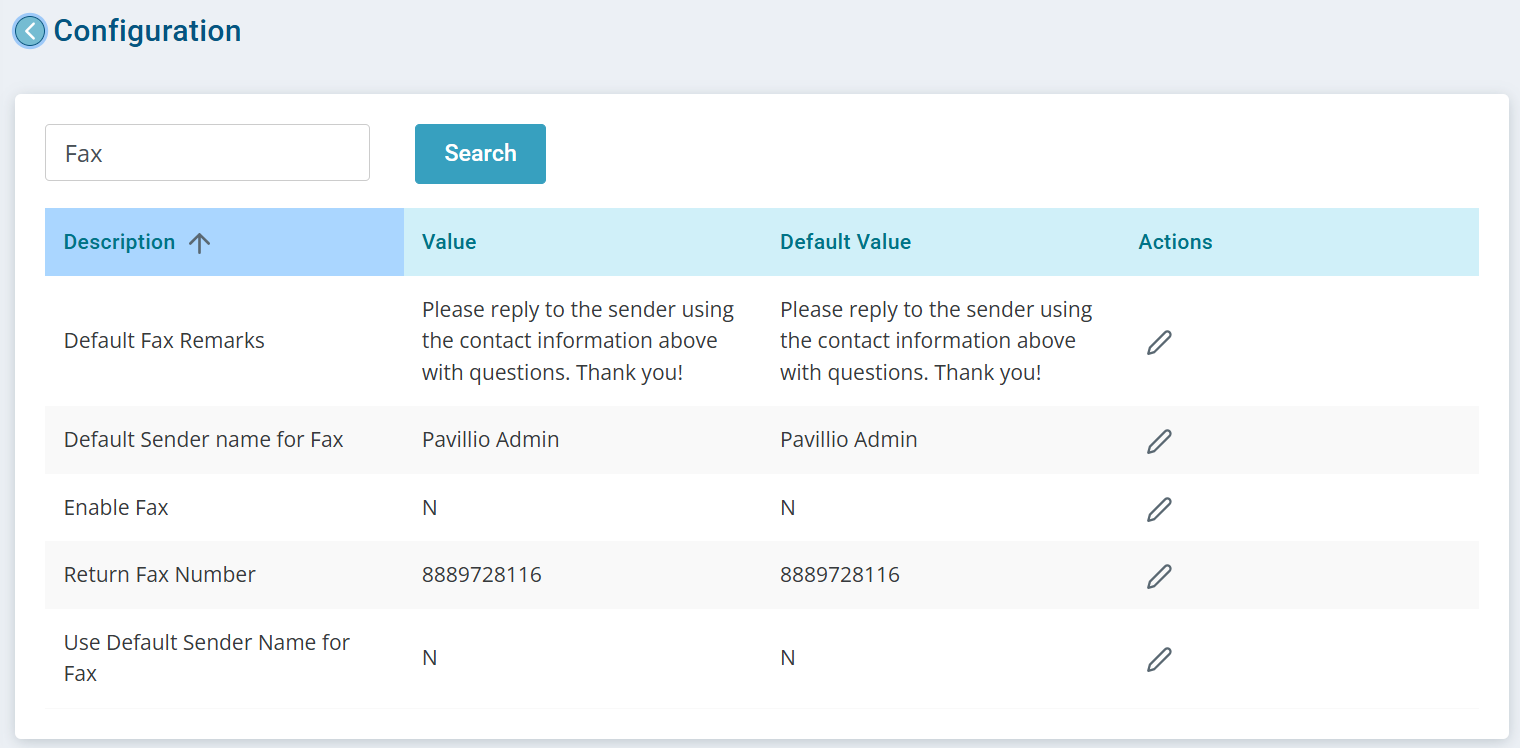
Search for Fax.
-
Select the Action icon beside the following values to open the Edit Configuration window:
-
Enable Fax: Select Y.
-
Default Fax Remarks: There are remarks that go out as part of the fax coversheet. You can edit these remarks to personalize them for your agency.
-
Default Sender name for Fax: If you choose to use the default sender, the Agency Admin is the sender name. You can change this to someone else by editing the Default Sender name for fax configuration.
-
Return Fax Number: Add the return fax number for your agency.
You will not receive in-bound faxes in Pavillio at this time but this number displays on the fax coversheet when sending a fax.
-
Use Default Sender Name for Fax: All faxes are sent from the logged in user, unless you choose to set up a default sender for your agency. Change this configuration to Y if you want to use a default sender name for all faxes.
-
-
Select Update to save.

Records must be finalized in Care Management > Approve Tasks prior to running the Client Payroll Export.
To set up your Client Payroll Export:
-
Go to Administration > Masters > Configuration.
-
Type Start Day of the Week in the search field and click Search
-
In the Actions column, click the Edit icon.
-
The Edit Configuration panel opens. In the Value dropdown, select the day of the week that your Agency consider the beginning of the work week. This setting applies to both Client and Employee payroll.
-
Click the Update button.
-
Type Payroll is computed in the search field and click Search
-
In the Actions column, click the Edit icon.
-
The Edit Configuration panel opens. In the Value dropdown, select either By Minute or By Quarter Hour.
-
Click the Update button.
For instructions on how to generate payroll, see Export Client Payroll.
Pavillio cannot create invoices for the work done by your individuals. Use the Payroll Export to gather the data necessary for creating invoices outside of Pavillio.

When completing Paper Timesheets, you can add a start date, end date, start times, and end times.
To add start and end times to Paper Timesheets, turn on this feature.
-
Go to Administration > Masters and then select Configuration.
-
Search for Paper, and then select the Pencil icon for Paper timesheet input with Start/End Time under the Action column. The Edit Configuration window opens.
-
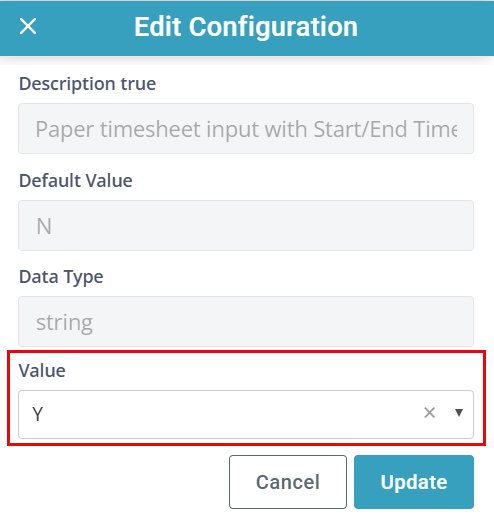
Select Y in the Value field on the Edit Configuration window.
The default value is N for no, meaning this is not turned on.
-
Click Update. A message displays that the change is applied at your next login.
The next time you log into Pavillio, you can add Start and End Times to Paper Timesheets.
Other Resources
