Client Billing Setup
In order to make sure you are capturing revenue from a Client's very first claim, it's important to make sure your billing is set up correctly from the beginning.
To set up billing for a Client:
-
The Payor and Service Line must be set up under Administration > Agency > Manage Payors. If you need assistance please submit a support ticket so we can assist you with this step.
- Go to Clients > Current Clients and find the Client record.
-
Click the Edit button at the top of the page.
- Go to the General Info tab, enter the Client's MA Number. This is needed to verify eligibility.
- Go to the Payor tab:
-
Go to the Care tab:
-
Click Add Care Period.
- Enter a Service Line and a Start Date. Leave the End Date blank to use the Care Period for as long as the Client receives the service. You may have multiple active Care Periods for different Service Types, but not for the same Service Type.
- Click the + Add button.
- In the Care Period's row, click the Add Service Agreement icon under the Actions column.
- The Select Payor window opens. Select your Payor from the dropdown menu and click Proceed to Service Agreement.
- Complete all required fields of the Service Agreement. For more information, see Add Service Agreement. Click the Finish button.
- Scroll down to the Care Period section of the Care tab. In the Care Period's row, click the Add Care Delivery icon under the Actions column.

- Fill out the form and click the Save button.
- Go to the ADL/IADLs tab and add a minimum of ADL/IADLs, Goals or Outcomes, so that your Caregivers can use the EVV tools for providing activities during their Visits. If you take the time to create an accurate care delivery, the next time you can clone it and make your edits.
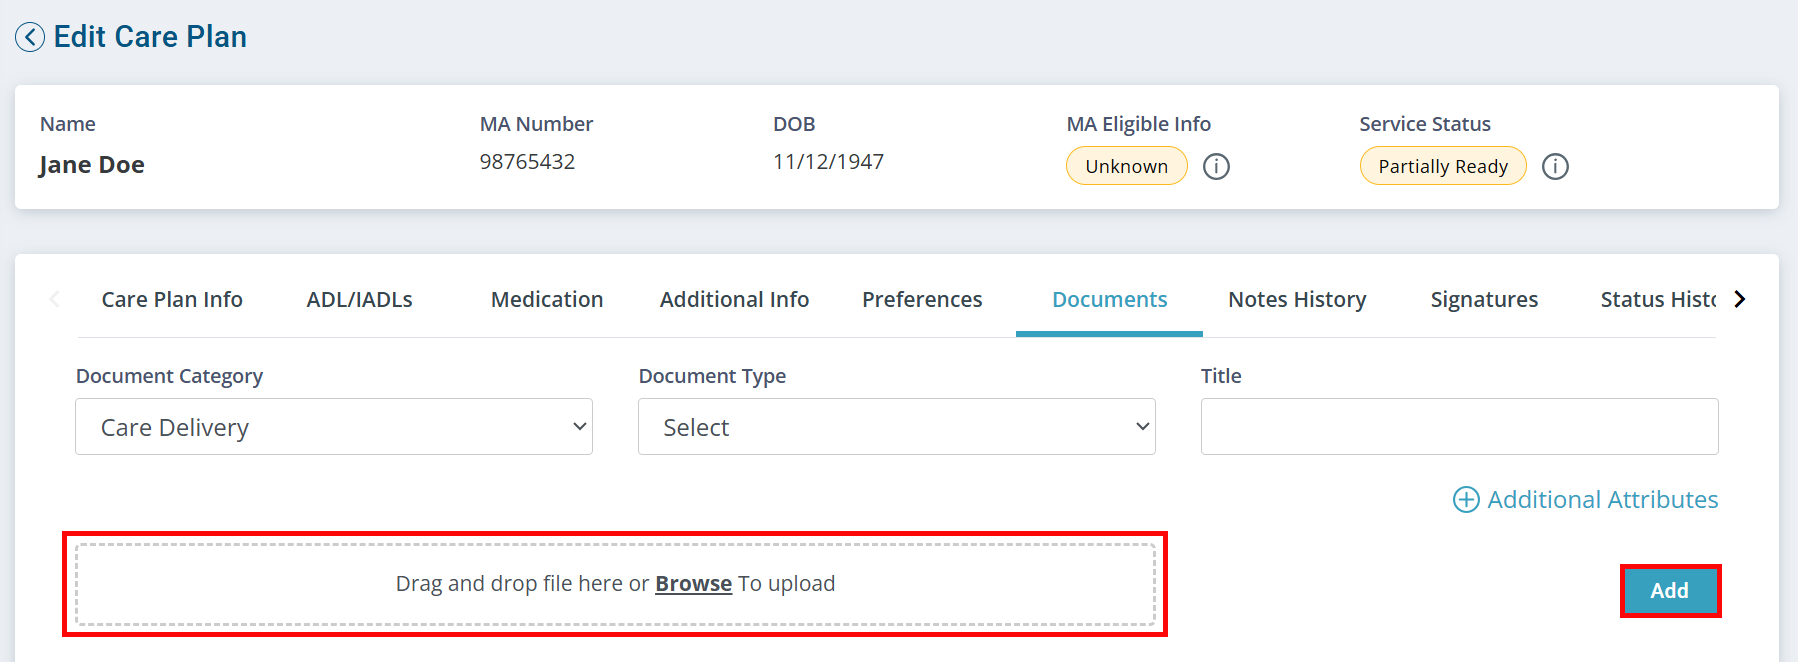
- Optional: Upload a PDF of the actual Care Delivery on the Documents tab by dragging and dropping the file and then clicking the Add button.

-
-
Optional: Eligibility Check
Eligibility Checks run automatically when a Client is added, and on the first of each month. If you'd like to run a manual Eligibility Check, go to the Client's Profile, click the Ellipsis next to the right of the Client's name and select Check Eligibility.
You are now ready to enter billable records either through the mobile app (EVV), My Stuff or Paper Timesheets.
