Add Units to a Closed Service Agreement
There may be times that you need to add units to a closed Service Agreement. Once you receive the Service Agreement, you will need to update it in Pavillio before submitting records or resubmitting the claims.

To add units to a closed Service Agreement:
- Go to Clients > Current Clients and find the Client record.
-
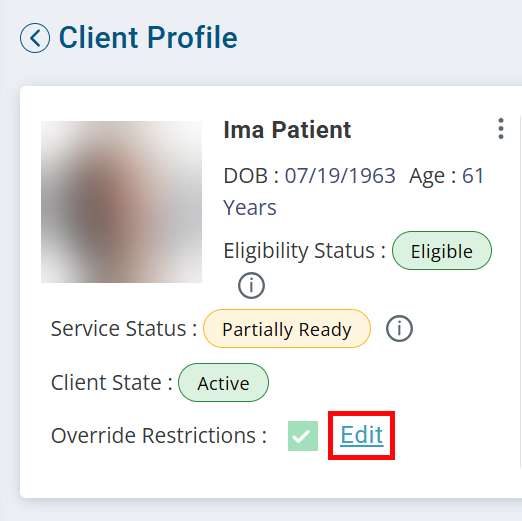
On the Client's Profile, click Edit under Override Restrictions:
-
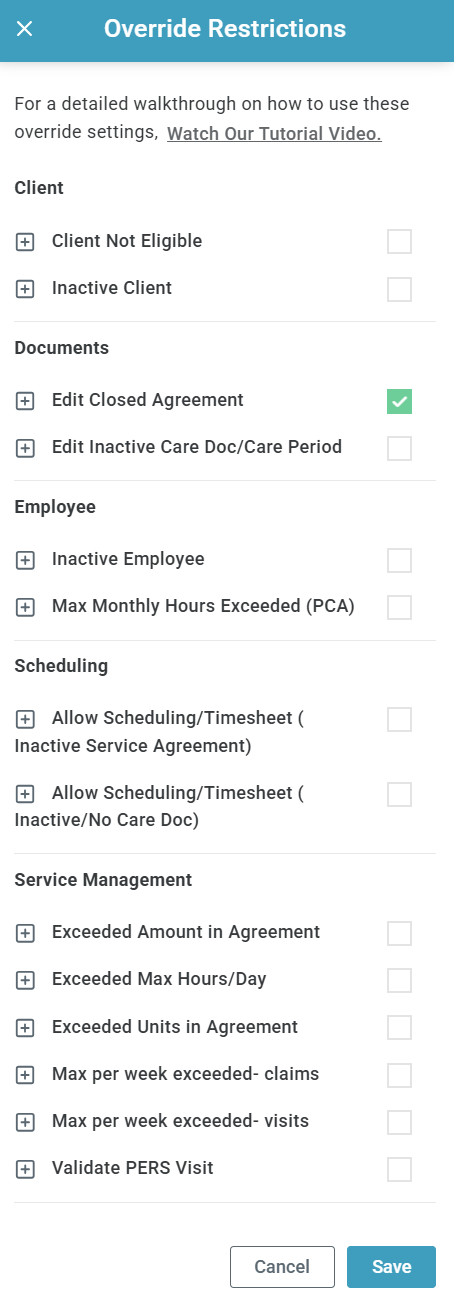
The Override Restrictions panel opens. Select the checkbox for Edit Closed Agreement under Documents. Click Save at the bottom of the panel.
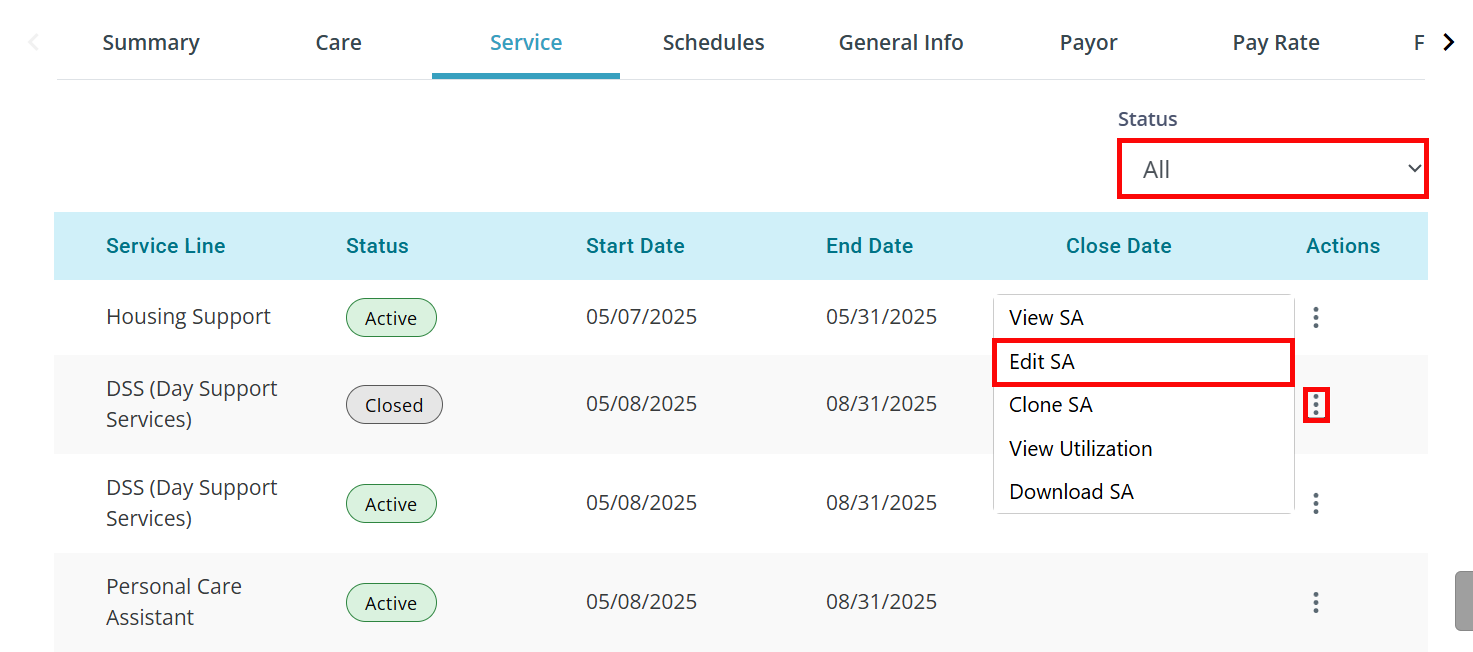
- Go to the Client's Service tab. Set the Status filter to All.
-
Locate the Service Agreement. Click the Ellipsis under the Actions column and select Edit SA.
- On the following page, click into the Line Items tab. Find the appropriate Line Item.
-
Click the Edit icon under the Actions column.
- Add the Total Units and click the Update button.
- Click the Finish button at the bottom of the page.
- Go back to the Client's Profile and click Edit under Override Restrictions.
- The Override Restrictions panel opens. Deselect the checkbox for Edit Closed Agreement under Documents. Click Save at the bottom of the panel.
- Go to Financials > Claims Management and either reprocess the claim(s) under the Denied card or re-validate the record(s) under the Failed card. Further instructions continue below.

-
Go to Financials > Claims Management. Set your filters and click the Search button.
-
Click on the Claim Denied card.
-
On the row of your record(s), click the Ellipsis under the Actions column, and select Add Claim Note. Add a note here for future reference.
-
Select the checkbox of the claim(s) you are working, and click the Move Claims to Workbench button.
-
At the top of the page, click into the Claims Workbench tab.
-
Set your filters and click the Search button.
-
Select the radio button of the claim you are working.
If needed, you can change the Service Agreement or modify the claim under the Actions column.
-
Click Resubmit (generally if nothing has been paid) or Replace (if some has been paid). These actions and requirements vary by payor.
-
Once the claim has gone through validation, it will go to the Ready card on the Process Claims tab. Select the checkbox of the claim and click the Send to Payor button.
Occasionally, the claim may go to the Failed card where the error message will tell you how to resolve the failure.

- Go to Financials > Claims Management. Set your filters and click the Search button.
- Click on the Failed card:
-
Select the checkbox of the record(s) you are working on. Click the Perform Action button, and select Re-Validate Claims.
-
Records will go back through validation, picking up the changes that were made in the Service Agreement. They will then go to the Ready card. Select the checkbox of the claim(s) and click the Send to Payor button.


