Set Up Skilled Services
Setting up a Client for Skilled Services ensures that all required clinical, Payor, and documentation details are in place to support accurate care delivery and billing.
To set up a Client for Skilled Services:
-
Go to Clients > Current Clients and click on the Client.
-
Click the Edit button at the top of the page.
- On the Client's Care Team tab, Add a QP/RN to the Client's Care Team.
- On the Client's Physician tab, search for the Physician, enter a Consulted Date, and click the Add button.
- On the Client's Payor tab, ensure that the Payor and MA/MCO Number are accurate.
- On the Client's Care tab, click the Add Certification Period button.
- Select the Start Date, Occurrence Start Code, and End Date . Click the + Add button. The End Date defaults to 60 days. This can be adjusted to your Agency’s preferences in Administration > Masters > Configurationunder Cert Period in Days.
- Under the Actions column, click the Add Care Document icon.
- The Add Care Document window opens. Select 485 from the Care Document Type dropdown. Then, click on the form and click the Select button.
- Complete the 485 form and send the fax.
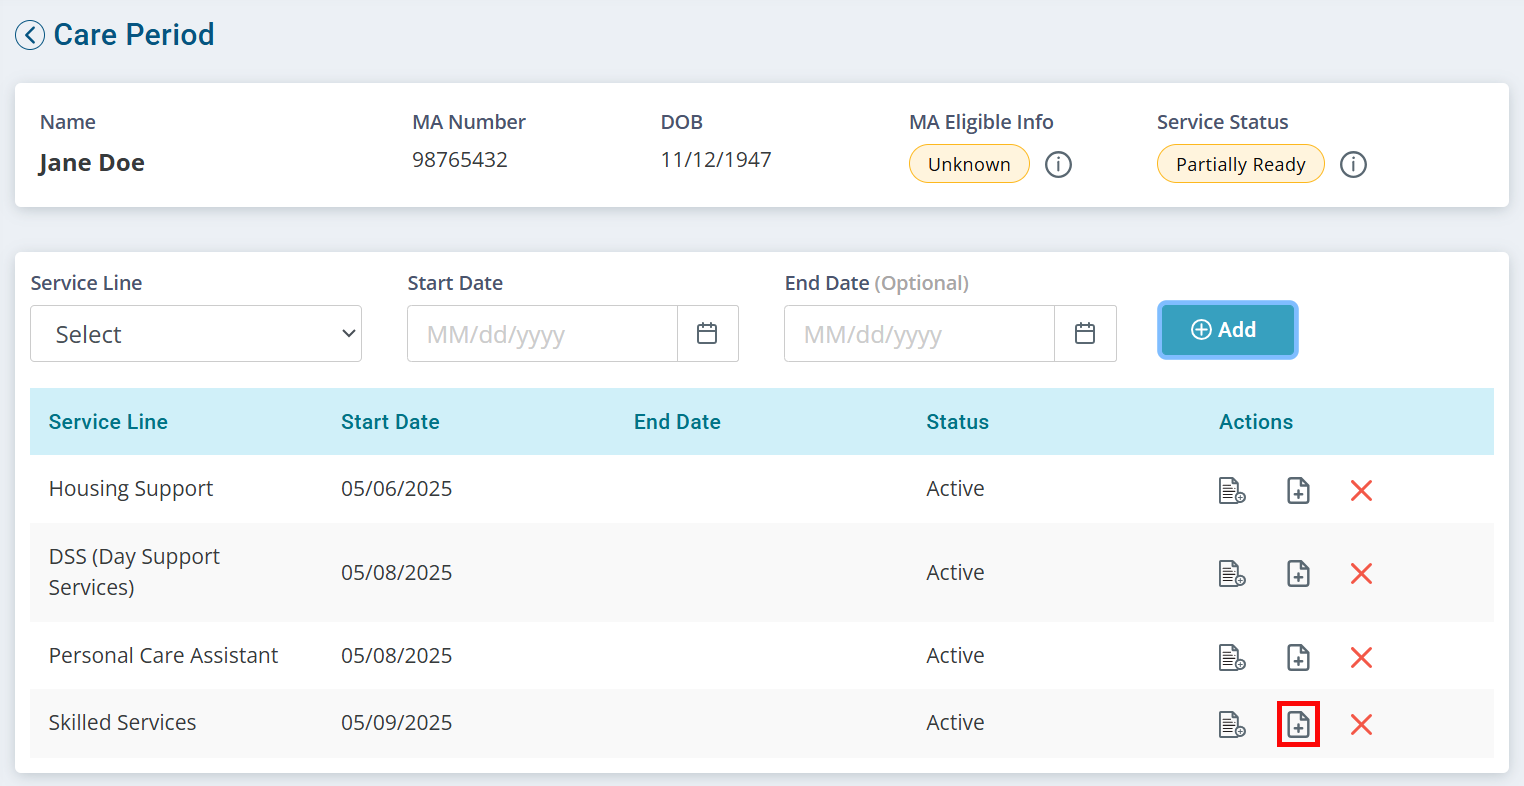
- On the Client's Care tab, click the Add Care Period button.
- Select Skilled Services from the Service Line dropdown. Enter the Start Date. Do not enter an End Date. Click the + Add button.

- Under the Actions column, click the Add Care Delivery icon.

- Click Skilled Care Plan, and then click the Select button.
The dates of the Care Delivery should match the dates of the 485.
You can add a note indicating to refer to the 485 for details instead of completing the form with accurate data.
- Under the Actions column, click the Add Service Agreement icon.
- On the Agreement Overview tab, make sure that the Auto Priority is set to No. This allows your QP/RN to select the correct code in the Visit record.
- Select Skilled Services from the Service Line dropdown. Enter the Start Date. Do not enter an End Date. Click the + Add button.