Add a Responsible Party
Active Responsible Parties are Users who can approve Visits in the Pavillio Mobile App. A unique email address is required for every User.

- Go to Clients > Current Clients and find the Client record.
- Go to the Contact Info tab.
- Click the Edit button at the top of the page.
- Click the Search Contact button. The Search Contact window opens.
- Enter the information in one of the fields and then click the Search button.
- Click on the contact record and click Select.
If there are more then one contact record for the individual, go to Manage Contacts to correct the issue (see Correct Multiple Contact Records for a Responsible Party below).
If the contact does not display, click the Create Contact button and complete all required fields in the Add Contact panel that opens.
- The Search Contact window closes. The contact name auto populates in the Name field.
- Select Responsible Party under the Contact Type dropdown. Click Add.
-
Click the Update button at the top of the page.

-
Go to Administration > Manage Users.
-
Click the Add Other User button at the top of the page. The Add Other User window opens.
-
Enter the information in one of the fields and click the Search button.
-
Click on the contact record and click Select. The Add Other User window closes.
-
The Assign Other User panel opens. Under Select Role, select Responsible Party.
-
Click Save.
The User receives an email with a temporary password to log in to the Pavillio Mobile App.
They also receive a separate email with a 4 digit PIN for signing Visit records on the Caregiver's device.

-
Have the Responsible Party log into their app and click on the Profile icon along the bottom of the screen.
-
The Responsible Party clicks the Reset Pin button. This sends a system-generated PIN-reset email to them.
OR
The Responsible Party clicks on Change Pin, enter their current PIN and enter the PIN number of their choice.
-
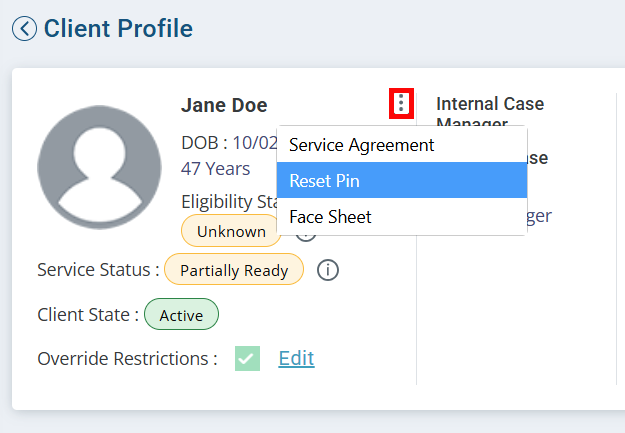
If the Responsible Party is the Client: Agency staff can go to the Client Profile and click the Ellipses near the Client’s name in the upper left corner. Click Reset Pin to send another email with a system-generated PIN.

-
Go to Administration > Manage Contacts.
-
Locate the Contact records and click the Edit icon under the Actions column.
If you have assigned the individual to the Client Profile already you can add a 1 after the last name. This helps you identify which record is associated to the client.
-
In the extra contact record, enter DONOTUSE for the first and last name. Enter a fake email address and any other fake information that you want. Click Update at the bottom of the form.
-
In the correct contact remove the 1 after the last name if applicable. Click Update at the bottom of the form.
