Complete a QP Aide Supervision Form
You can access a QP Aide Supervision Form from within the Client Profile, or under My Stuff > My Clients. If the Client doesn't appear under My Stuff, you are not assigned as their QP/RN. You can adjust this on the Client's Profile on the Care Team tab.
Before beginning, ensure that there is a pay rate for the role of QP/RN under the Pay Rate tab in the Employee's Profile.
-
Go to Clients > Current Clients and click on the Client.
-
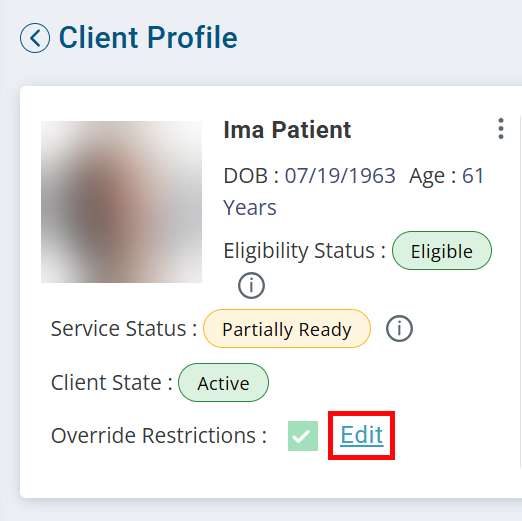
If you are working with a closed care delivery: On the Client's Profile, click Edit under Override Restrictions:
- The Override Restrictions panel opens. Select the checkbox for Edit Closed Agreement under Documents. Click Save at the bottom of the panel. Make sure to turn the override off when you are finished.
-
-
Go to the Care Team tab.
-
Verify that you are listed as a QP/RN. If you are not assigned:
-
Click the Edit button at the top of the page.
-
Select QP/RN from the User Role dropdown.
-
Enter your name in the Employee field.
-
Click the Add button.
-
Click the Update button at the top of the page.
-
-
Go to the Care tab.
-
Locate the current Care Period with a Care Plan. Click the + to the left of the Care Period.
-
Click the Ellipsis under the Actions column. Select Aide Supervision.
-
On the following page, click the + Add Aide Supervision button to access the form.
-
The Aide Supervision Details page opens. Select your name under the Qualified Professional dropdown. If no QP appears for you to select, or your name is not in the list, this is an indicator that no QP is assigned and follow step 3 above.
-
Enter or select the applicable information for the fields. Be sure that the AM and PM are selected accordingly. You cannot do multiple Supervision visits at the same time. You may get an error that indicates overlapping visits. Change the times to prevent overlapping.
-
Indicate if the Client is satisfied with the services being provided by this Caregiver by selecting the Client is Satisfied checkbox, and enter any comments in the Comments or Notes fields.
-
Optional: Enter information for the QP Next Aide Supervision Date.
The QP Next Aide Supervision Date can be entered as a task with a due date by clicking Create Contact Note at the top of the page. Enter the appropriate information and select the This is a Task checkbox. This task will display in My Stuff > Tasks/Notes and in the Client Profile on the Summary tab.
-
When finished, click Submit. By clicking Submit you will create a Visit record for your Agency to approve underCare Management > Approve Visits and finalize the record for billing.
