Private Pay Client Setup
Private Pay lets you provide service to Clients without the need to be enrolled in state programs. This topic will review the Client setup, which must be done after the Agency setup. For information about Agency setup, see Private Pay Agency Setup.

-
Go to Clients > Current Clients and click on the Client.
-
Go to the Care tab.
-
Click the Add Care Period button.
-
Select Private Pay from the Service Line dropdown. Add a Start Date, and click the + Add button.
-
Under the Actions column, click the Add Service Agreement icon.
-
The Select Payor window opens. Select PPAY-[State] from the Payor dropdown. Click the Proceed to Service Agreement button.
-
The Agreement Overview tab opens. Select the Status and complete all required fields, including the Total Budget (USD). Click the Next button.
-
On the Diagnosis Code tab, you can add or change codes as needed. Click the Next button.
-
On the Line Items tab, select a Service Code under Private Pay Service Code. Complete all required fields, including Total Units and Rate. Click the Add button. Click the Next button.
-
On the Invoicing Details tab you can determine who receives the invoice, as well as invoice frequency. By default, Pavillio assumes that the invoice goes to the Client. You can choose to send the invoice to someone else, or divide the total amount of the invoice between two or more people.
-
Click the Finish button.

This is in order to send the Private Pay invoice to someone other than the Client. Add as many Billing Contacts as needed.
-
Go to Clients > Current Clients and click on the Client.
-
Go to the Contact Info tab.
-
Click the Edit button at the top of the page.
-
Click the Search Contact button.
-
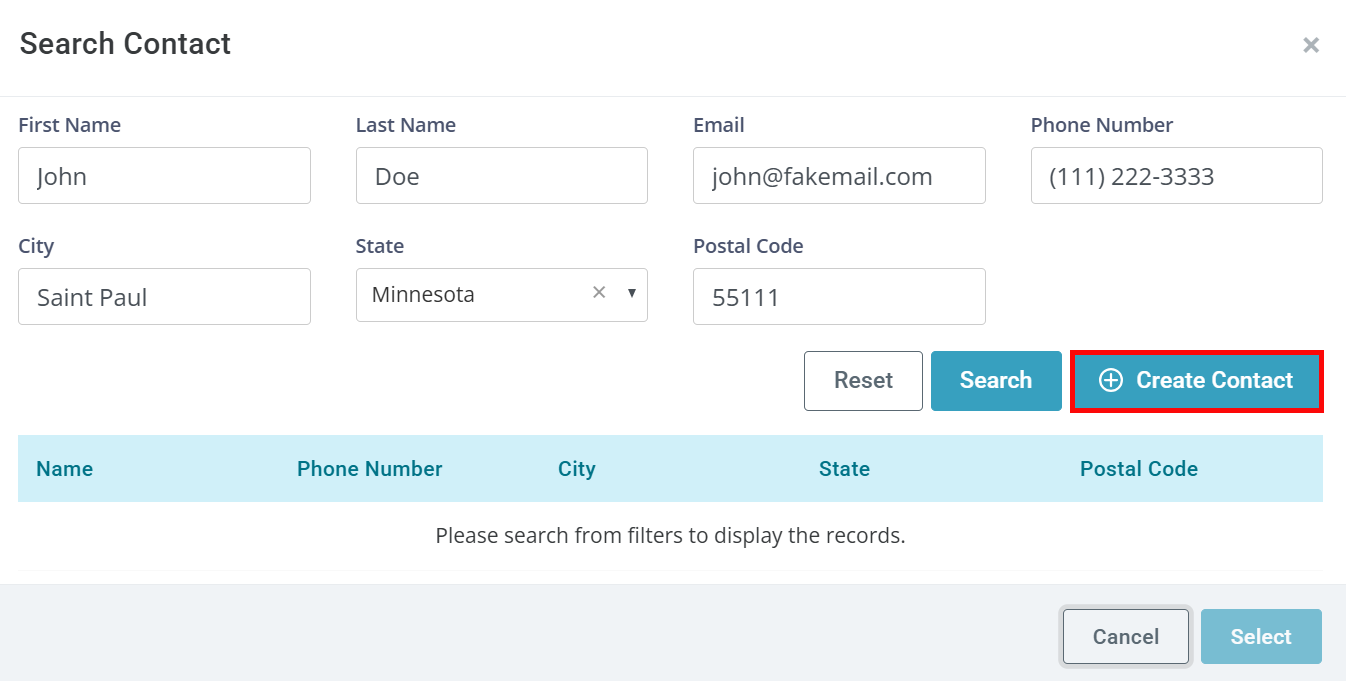
The Search Contact window opens. Enter the contact's information and click the + Create Contact button.
-
The Add Contact panel opens. Add any additional necessary information and click the Save button.
-
Back on the main page, select Billing Contact under the Contact Type dropdown. Click the Add button.
-
Click the Update button at the top of the page.
When creating a Billing Contact a contact record is automatically created and maintained under Administration > Manage Contacts. These contact records can be used for multiple individuals' Billing Contacts.


