Interim Service Agreements
An Interim Service Agreement allows you to continue to provide services while waiting for a new authorization to arrive. It allows you to approve Visits and pay Caregivers.
Records finalized during this time will go to the Failed card in Financials > Claims Management. Once the new authorization arrives, change the Status of the Service Agreement from Interim to Active. Claims under the Failed card will be re-validated and become ready for billing.
Do not create multiple Interim Service Agreements. This causes issues with records waiting in Financials > Claims Management.

-
Go to Clients > Current Clients and click on the Client.
-
Go to the Service tab.
-
Find the currently active Service Agreement. You may need to change the Status so you see All agreements.
-
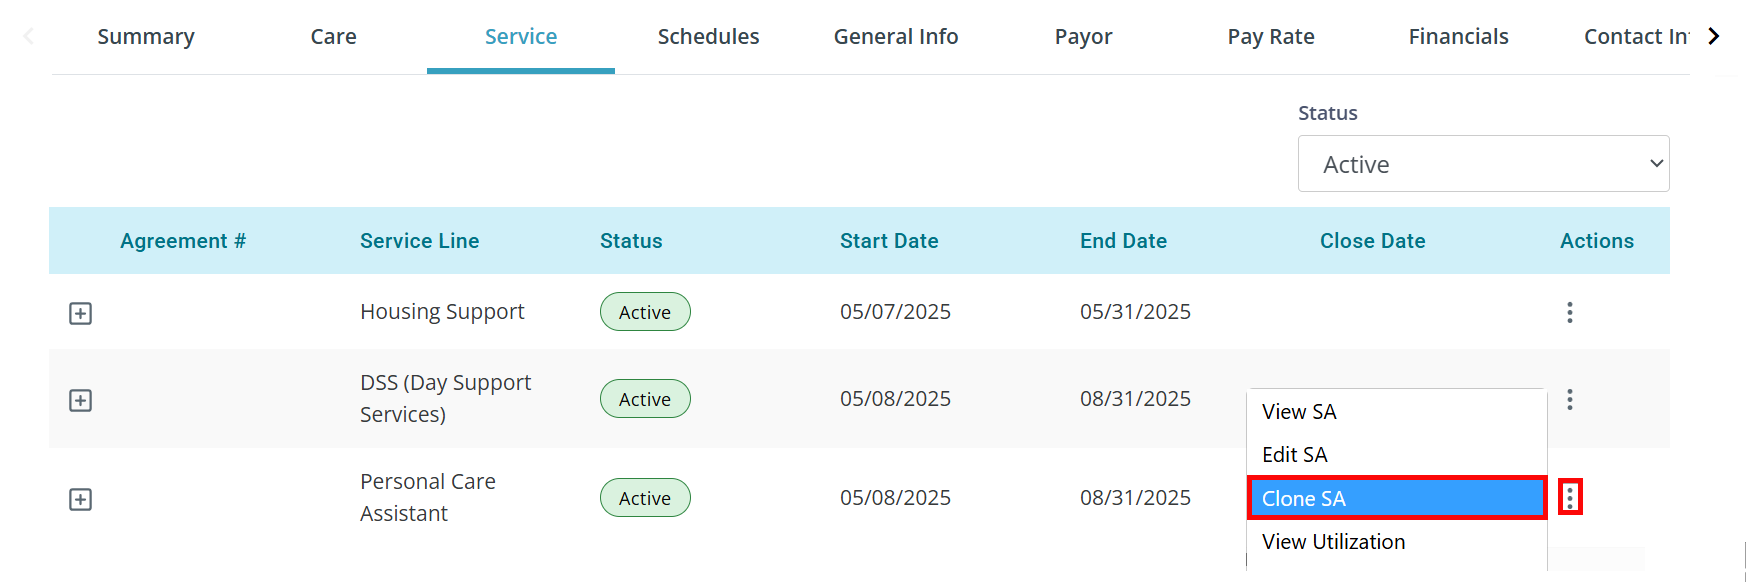
Click the Ellipses under the Actions column. Select Clone SA. This will create and open a copy of the existing Service Agreement.
-
The first tab to open is Agreement Overview. Select Interim from the Status dropdown.
-
An alert will appear. Click OK.
-
In the SA Number field, enter something to make it very clear that this is an Interim Service Agreement. We recommend PENDING SA, INTERIM SA, or even INTERIM. This helps your biller easily identify these claims.
-
Set the Start Date and End Date at normal Service Agreement length. If the normal length for a Service Agreement is 3 months, set this for 3 months.
-
Fill out the rest of the fields as with a regular Service Agreement. Click the Next button at the bottom of the page.
-
Review the Diagnosis Codes. Click the Next button at the bottom of the page.
-
Complete any Line Item changes as needed. Click Finish at the bottom of the page.

-
Go to Clients > Current Clients and click on the Client.
-
Go to the Service tab.
-
Find the currently active Service Agreement. You may need to change the Status so you see All agreements.
-
Click the Ellipses under the Actions column. Select Edit SA.
-
The first tab to open is Agreement Overview. Select Active from the Status dropdown.
-
Enter the new Service Agreement number in the SA Number field.
-
Update the Start Date and End Date.
-
Fill out the rest of the fields as with a regular Service Agreement. Click the Next button at the bottom of the page.
-
Review the Diagnosis Codes. Click the Next button at the bottom of the page.
-
Complete any Line Item changes as needed. Click Finish at the bottom of the page.
When a Service Agreement is updated, the claims under the Failed card in Financials > Claims Management will re-validate. In most cases they will go to the Ready card for billing.

Interim agreements can also be updated from the Hub.
Pavillio updates the current authorization based on your approval.
Closely review the information on the Service Agreement before you finalize the changes.
