Clients Care Tab

-
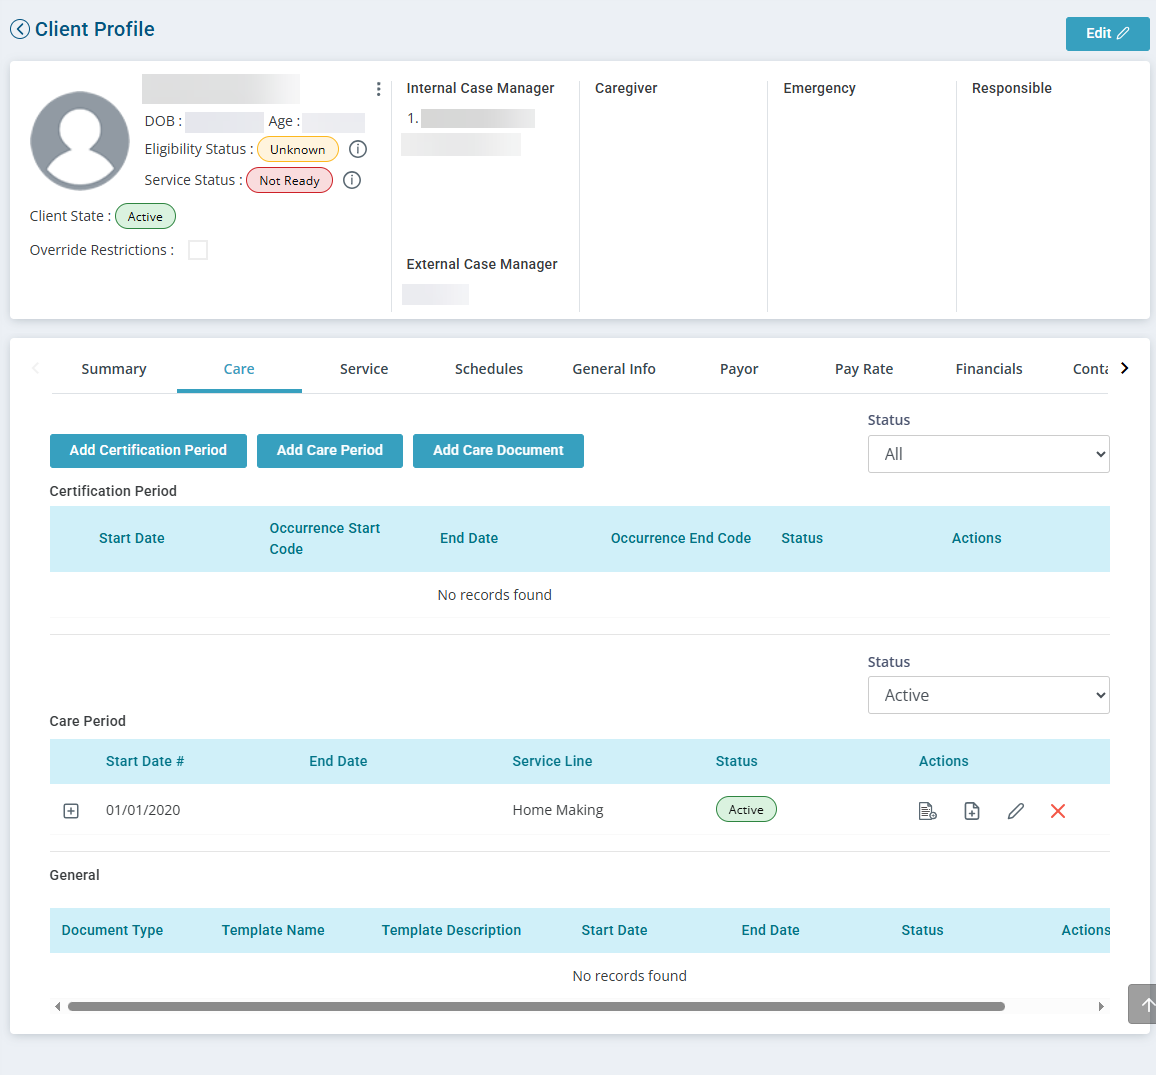
Go to Clients > Current Clients > Search for the individual.
-
Click the user name to open the Client Profile.
-
Click Add Care Document.
-
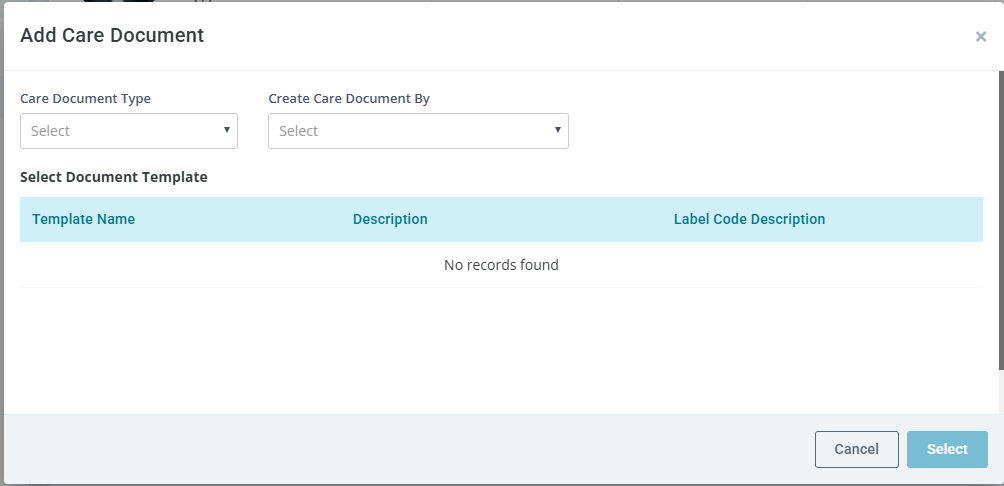
In the Add Care Document window
-
Select a Care Document Type.
-
Select where to store the document in the Create Care Document By field. The document can be applied to a specific service line or certification period, or it can be kept general to all service lines.
-
Select the document template.
-
Click Select.
-
-
Complete and save the document.

-
Go to Clients > Current Clients > Search for the individual.
-
Click the Client name to open the Client Profile.
-
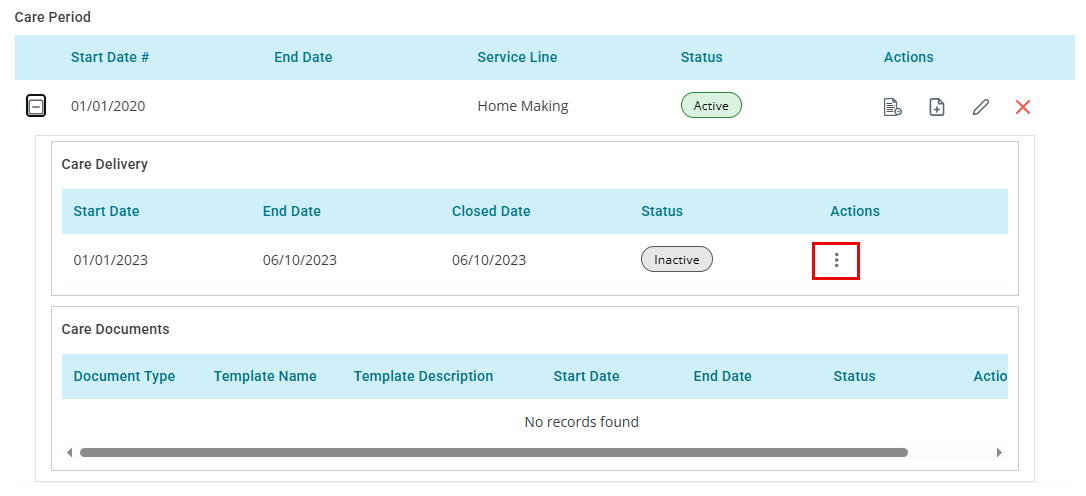
Select the Care tab and then click the + by the record under Care Period.
-
Either add a Care Period or locate the Care Period for the Service Line. If the Care Delivery is not listed, click the Add Care Delivery
 icon in the Care Period Actions column and create the Care Delivery.
 -
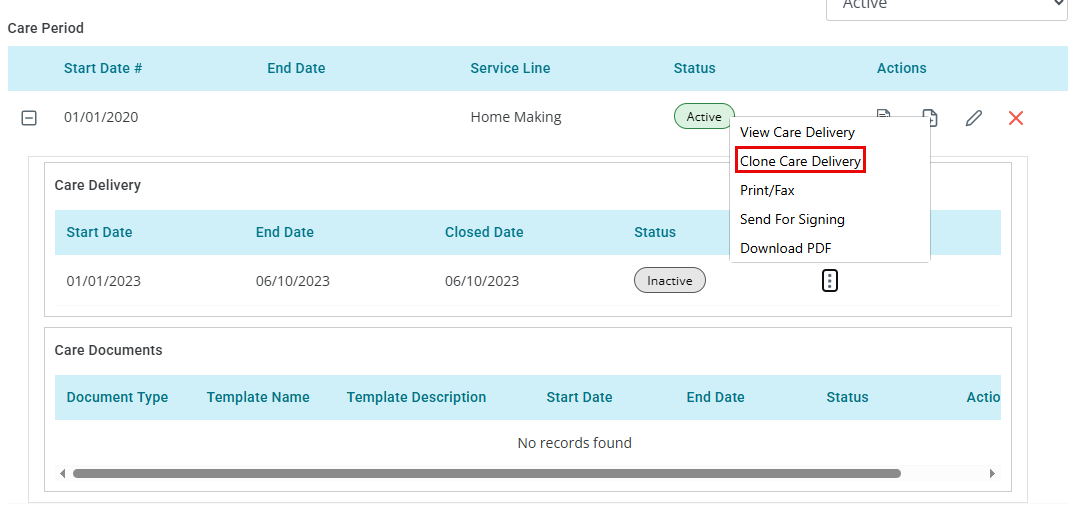
Click the Ellipsis in the Actions column by Care Delivery, end the current Care Delivery, and then select Clone Care Delivery.
-
In the Care Plan window select your Care Delivery.
When cloning, if the question or attribute is the same on the new template, the response pulls into the new version. Make sure to update the dates in the new template, as care document dates cannot overlap.

-
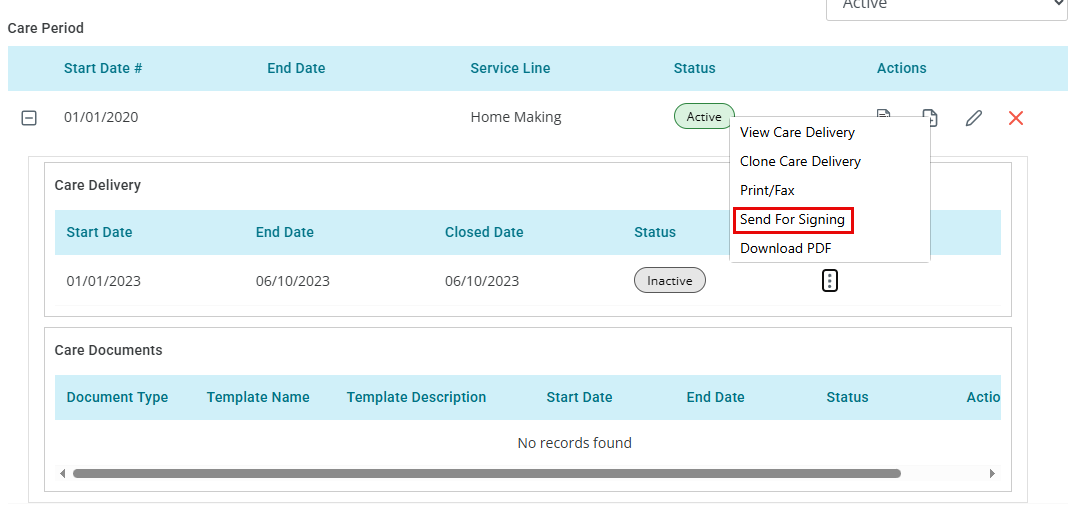
Go to Clients > Current Clients >, locate and open the individual’s profile.
-
Select the Care tab and then click the + by the record under Care Period.
-
Click the 3 dots in the Actions column by Care Delivery or Care Documents, and then click Send for Signing.
-
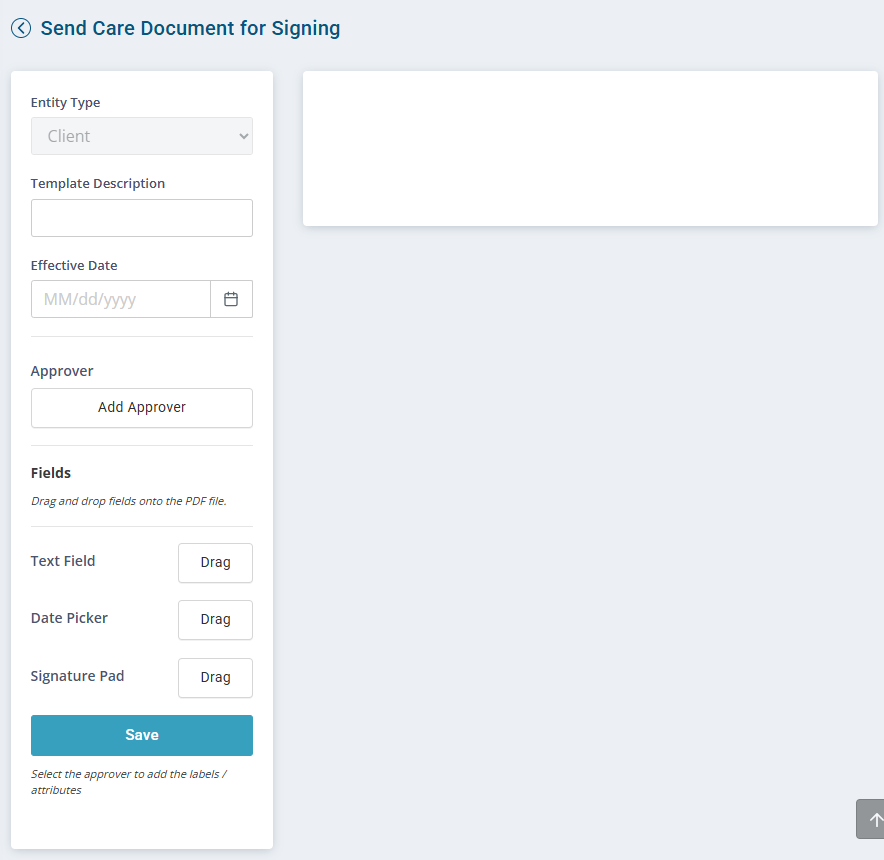
In the Send Care Document for Signing window
-
Add a Template Description.
-
Select an Effective Date.
-
Click Add Approver. Repeat for each approver.
Add one or more approvers to sign this document. Each Signer has a different color so you know where each is expected to sign.
-
Text Field: Click Drag and then in the document click the field for expected for the text to be entered. Repeat for each approver.
-
Date Picker: Click Drag and then in the document click the Date field. Repeat for each approver.
-
Signature Pad: Click Drag and then in the document click the Signature field. Repeat for each approver.
-
-
When finished click Save.
-
Recipients - search for the individual and then click Add.
-
Approvers - search for and select each approver.
-
Click Send.
Go to the Hub to see the document signature status and view the history.
