Add and Administer Medication (eMAR)
The Medication tab allows you to view and update a Client's Electronic Medication Administration Record (eMAR) to keep track of, administer and/or set up medications for a Client to self-administer.

-
Go to Clients > Current Clients and click on the Client record.
-
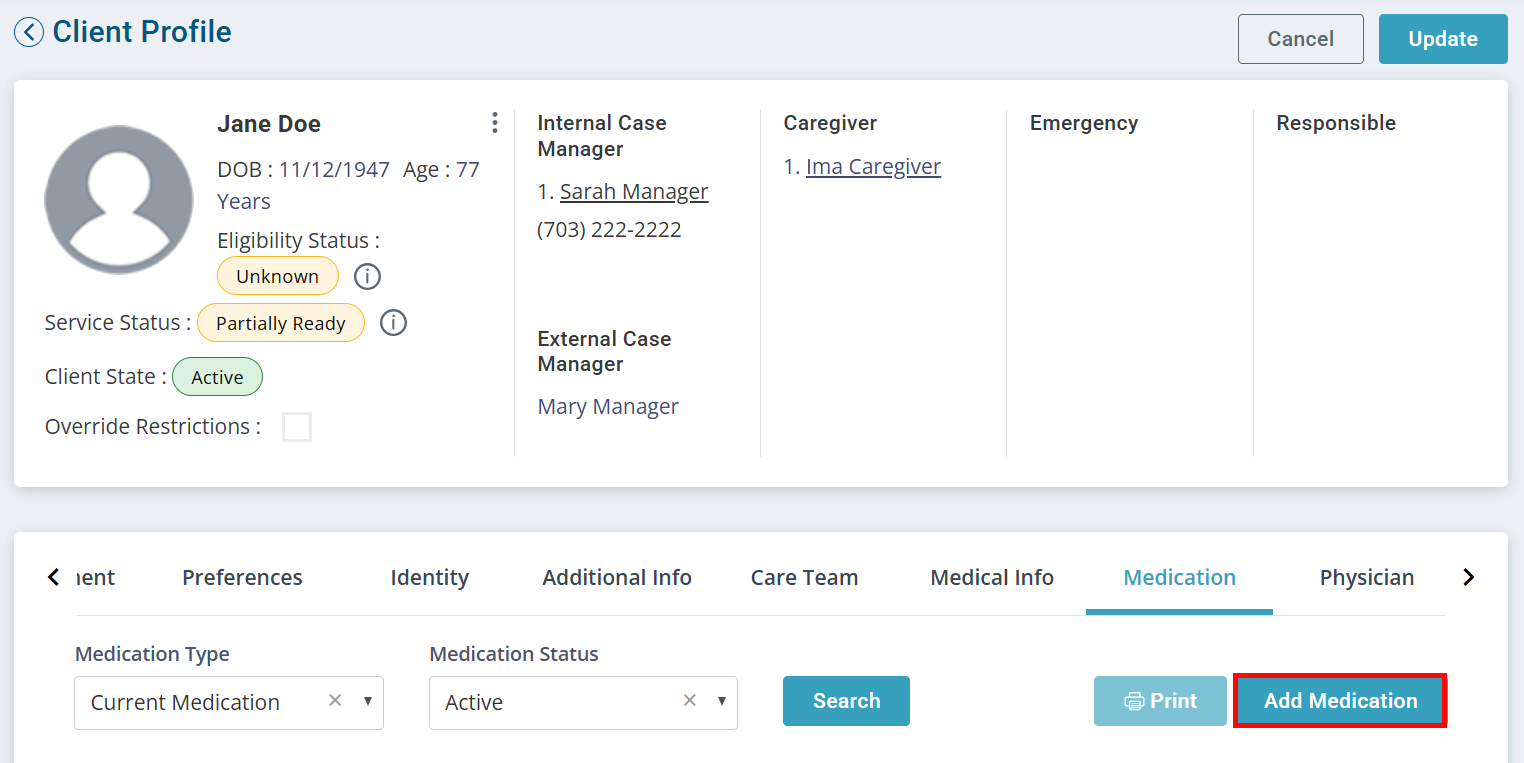
Go to the Medication tab.
-
Click the Edit button at the top of the page.
-
Click the Add Medication button.
-
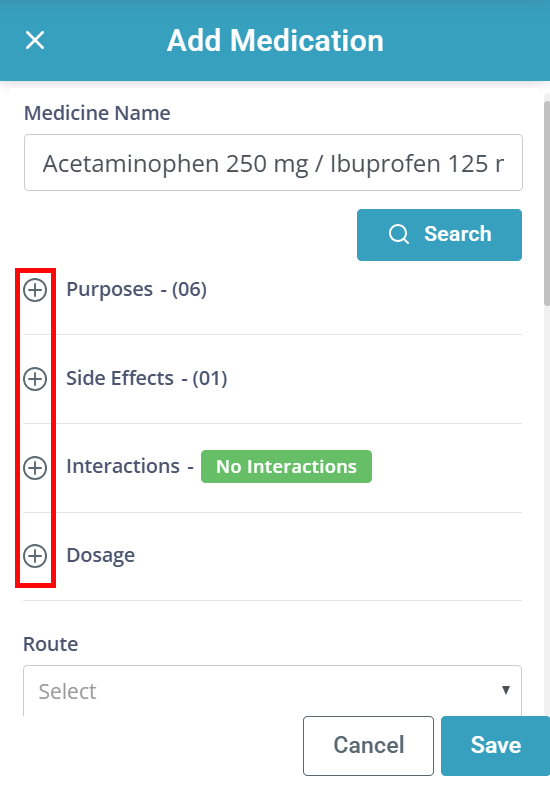
The Add Medication panel opens. Type in the medication name and click Search. You can select medication from the following 3 Drug Sources:
-
FDA Approved Medications
-
Vitamins and Supplements
-
Additional Medications: Medications manually added to your Agency (for medications not found on the other two lists). To add Additional Medications, go to Administration > Masters > Additional Medication
-
-
Select the medication and click OK.
-
Review the medication Purposes, Side Effects and Interactions by clicking the + icons.
-
Enter the prescription information per the prescriber's orders, including Route, Dosage, Dosage Units, Prescribed Start Date and schedule information. Notes can also be added.
-
Click Save.
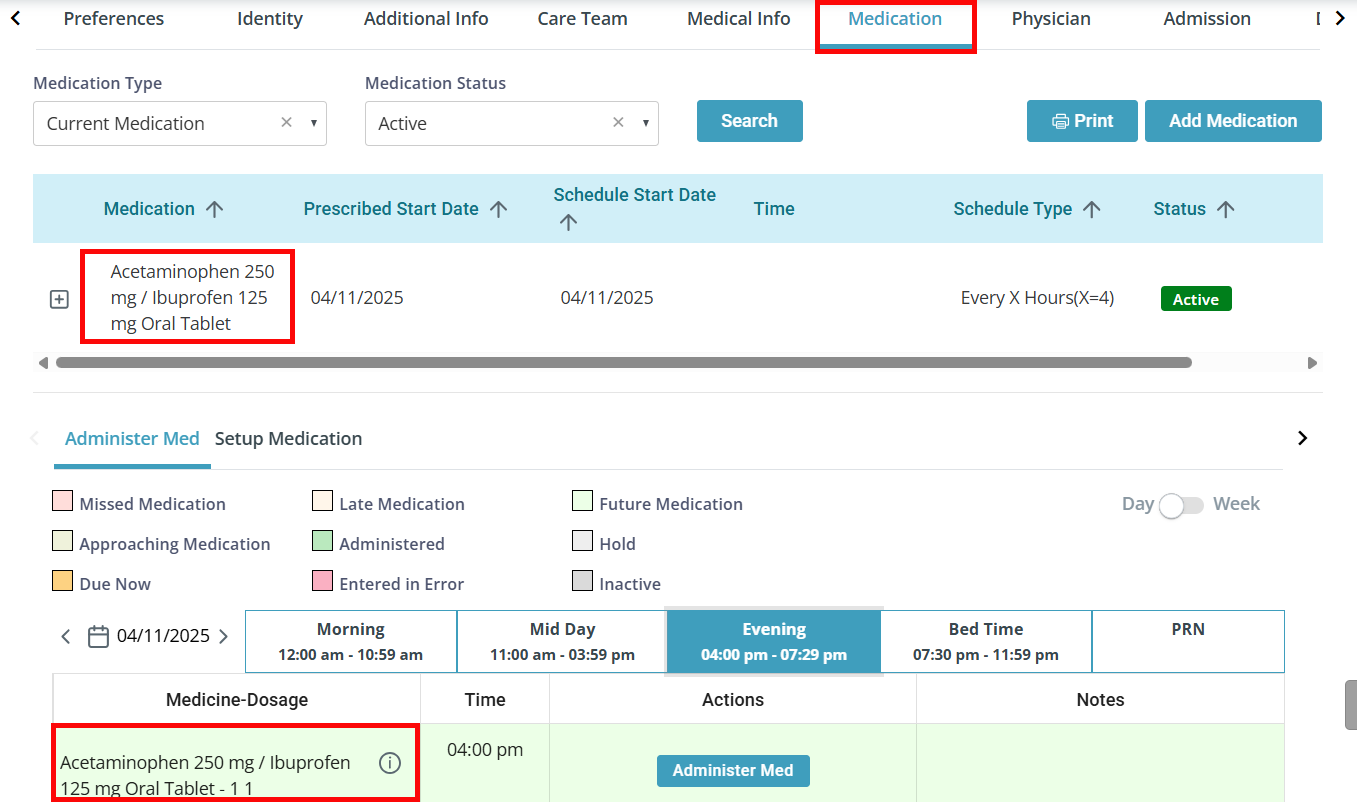
Once added, the medication is added to the printable medication list and the schedule of the eMAR based on the required time.

To remove a medication from a Client's list:
-
Find the medication record in the table and click the Ellipses under the Actions menu. Select Change Status.
-
The Change Status window opens. In the Status dropdown, select Entered in Error if the medication was added by mistake, or Inactive if the medication is no longer required.
-
Add a Note and click Update.
The medication history will remain in the Client record, but there is no active medication or associated schedule.

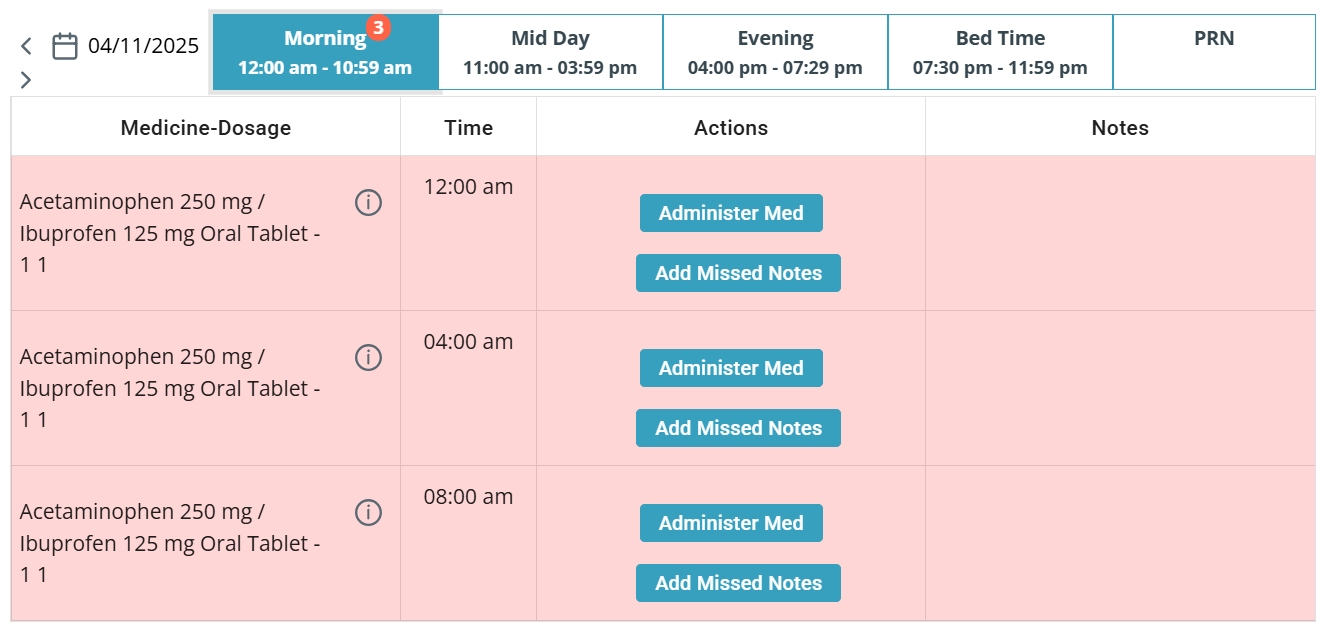
Every medication has a status based on the schedule entered for it: Future, Approaching, Due Now, Late, Missed, etc. These are color coded for quick recognition.
To administer a medication:
-
Find the medication record in the Administer Med section of the Medication tab and click the Administer Med button.
-
The Administer Med panel opens. Verify the details of the medication. The system will default to the correct dose and current time, but these can be edited for accuracy. Notes can also be added for the medication.
-
Click Save.

To view the details of an administered medication:
-
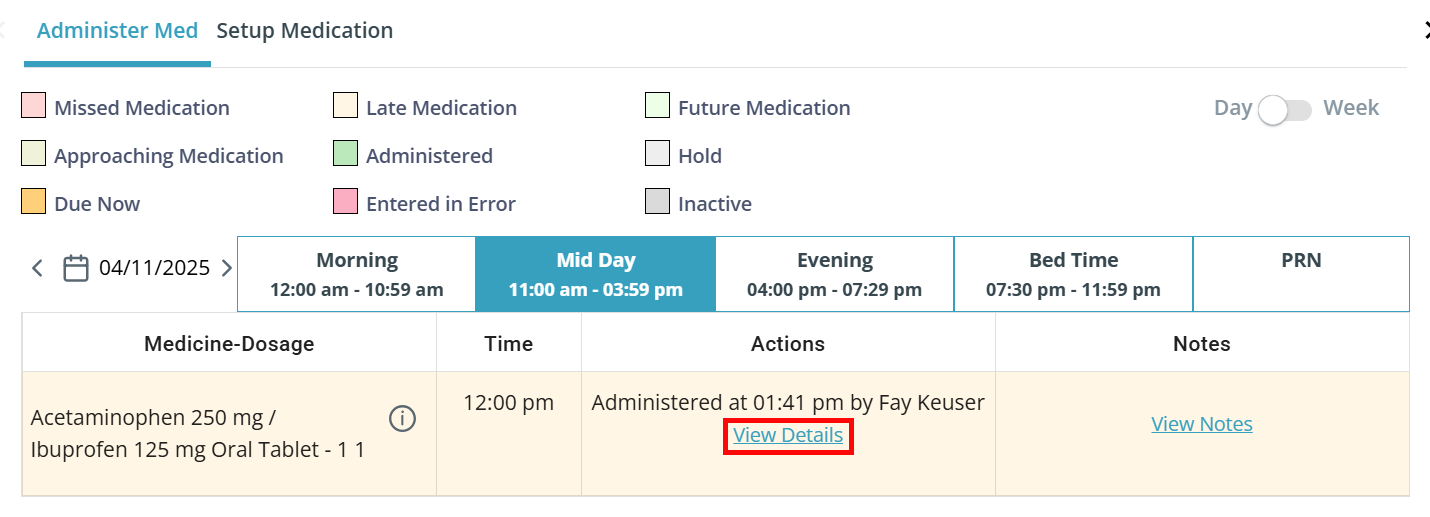
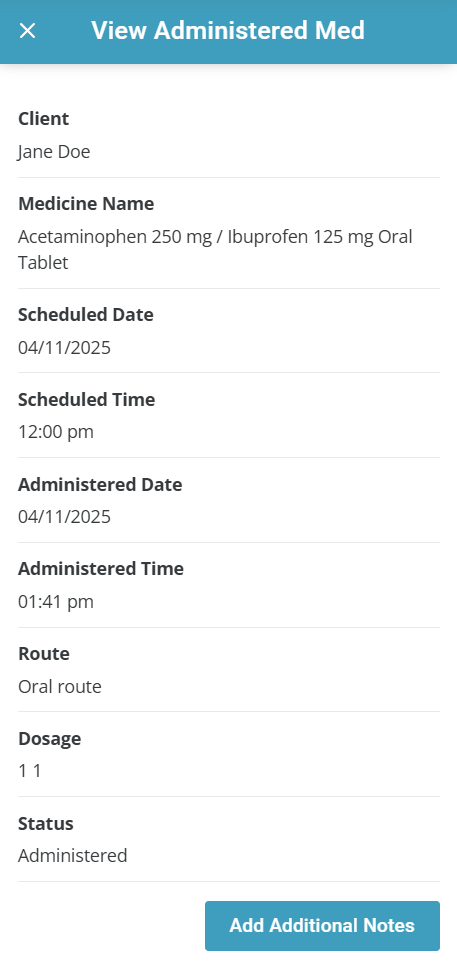
Find the medication under the Administer Med section and click View Details under the Actions column.
-
The View Administered Med panel opens.
-
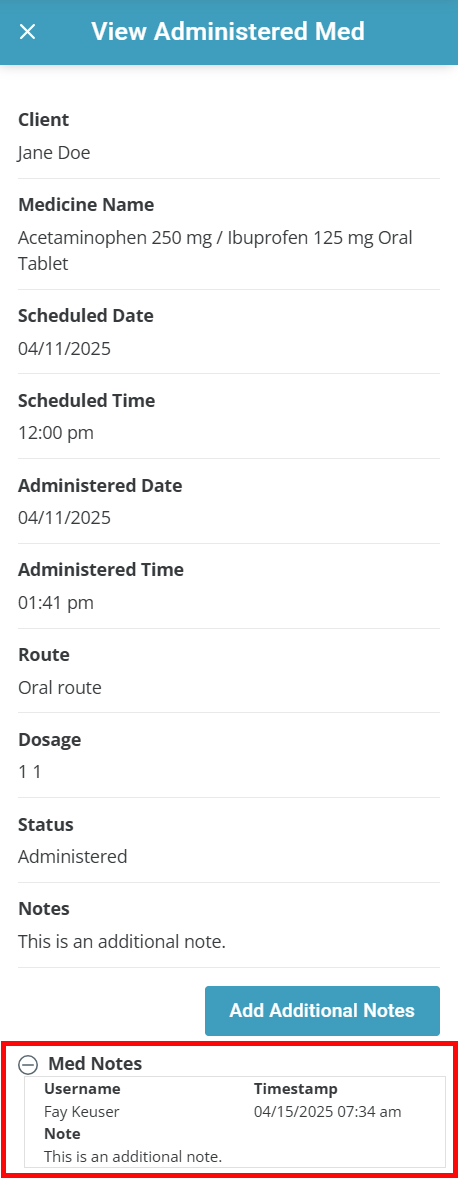
You can also add more notes at this point by clicking the Add Additional Notes button. Type in your note and click Save. The note is logged with a time stamp at the bottom of the View Administered Med panel.

If the Client only needs assistance with setting up medication and not fully administering, medications can be packaged according to the physician's orders and ready to be taken at the right day and time.
To set up medications for self-administration:
-
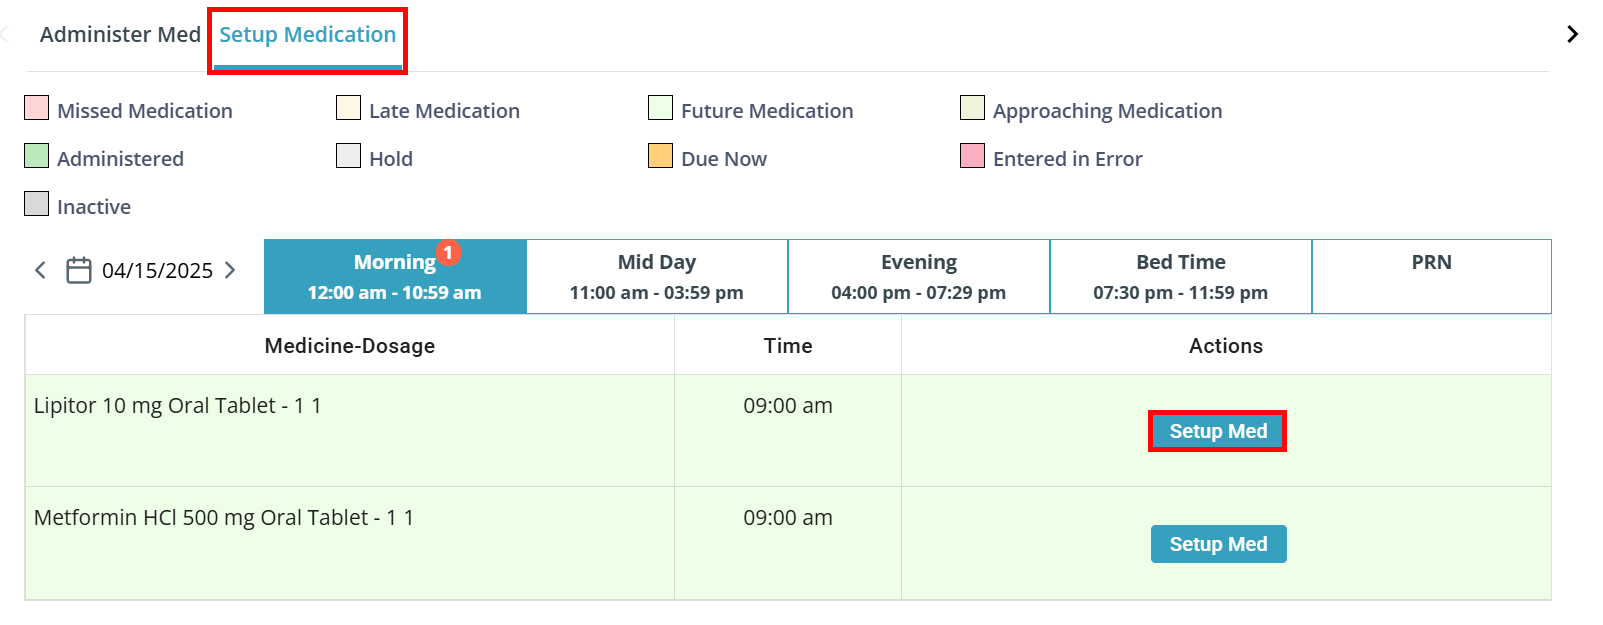
Click into the Setup Medication section on the Medication tab.
-
Under the Actions menu, click Setup Med.
-
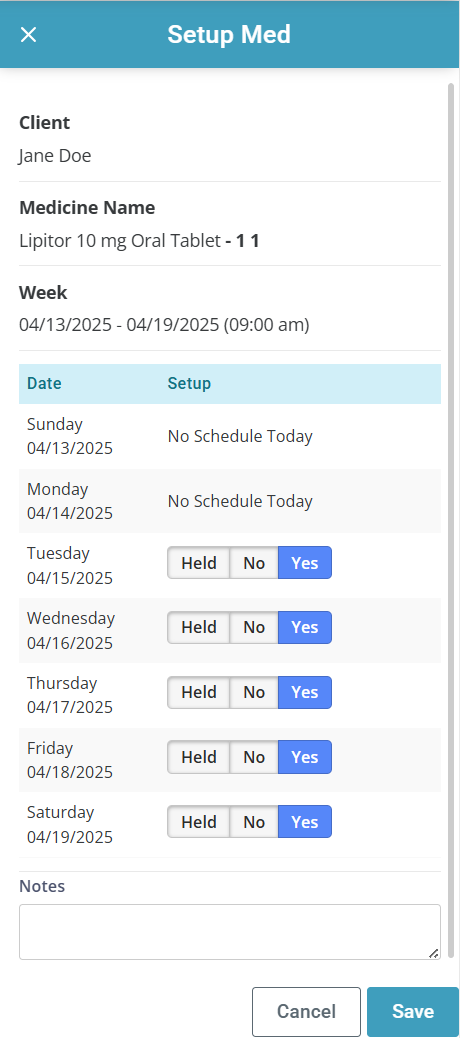
The Setup Med panel opens. One week of medications will display. If the medication is scheduled for each day of the week, you can select whether is has been set up (Yes), not set up (No), or Held. By default, No is selected.
-
Verify the Client, medication, date, time and dosage.
-
Medication Notes can also be added during setup.
-
Click Save.
-
Distribute the medication into the Client's med minder or device.
-
Repeat steps 2-7 with each of the Client's medications.
