Master Custom Fields Feature
The Custom Fields feature allows you to create fields unique to your agency in the Client or the Employee profile. The new fields are added to the Additional Info tab on the Client and/or Employee profiles.
Changes in the Custom Fields feature change data for the entire agency.

-
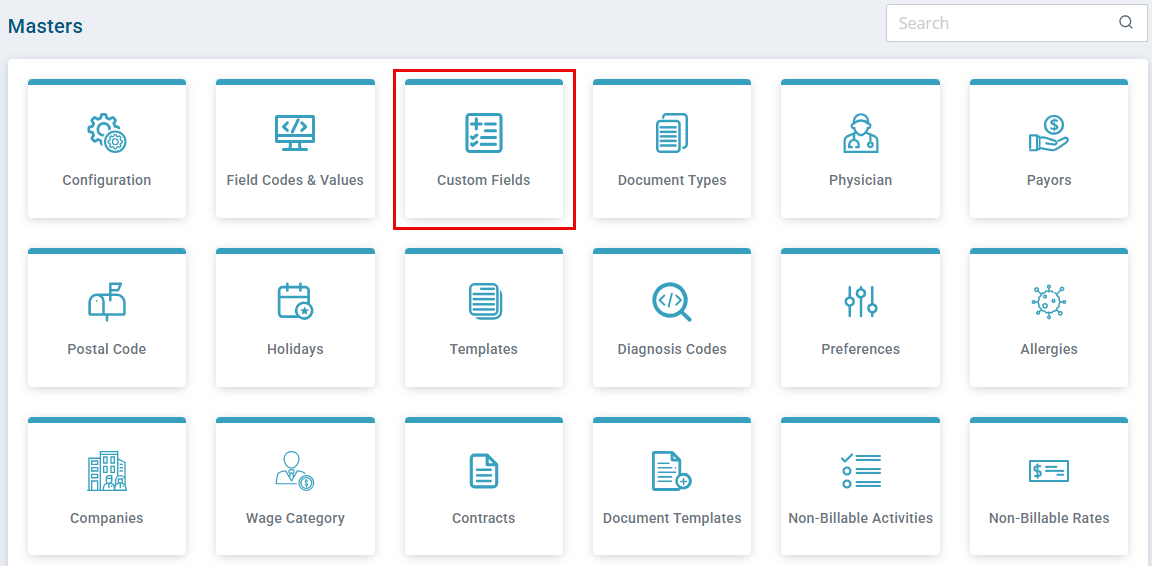
In Administration > Masters > Custom Fields
-
Click the Add Custom Field button.
-
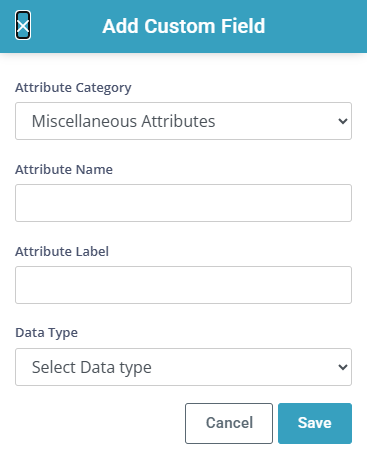
In the Add Custom Field window.
-
Attribute Category - Select an option.
-
Attribute Name - No spaces or special characters are allowed. This is a label code that is not visible to the users.
-
Attribute Label – The name that will appear in the form.
-
Data Type:
-
Base64: Do not use this option
-
Boolean: Yes/No Radial button
-
Code: Allows the user to enter a list of values, separated by commas. These values can then be chosen from a dropdown.
-
Date: Allows the user to pick a date from calendar or enter a date in MM/DD/YYYY format.
-
Decimal: Allows user to enter numeric value as decimal. Agency Admin can set the parameters after choosing decimal from dropdown.
-
Max Length: Default value (sum of Digits Before Decimal and Digits After Decimal)
-
Digits Before Decimal: Choose the number of digits allowed before the decimal point.
-
Digits After Decimal: Choose the number of digits allowed after the decimal point.
-
Number: Allows User to enter a numeric value without a decimal. Agency Admin can set parameters for max characters allowed in the Maximum Length field
-
String: Open alpha-numeric text field. Agency Admin can set parameters for max characters allowed (up to 255 characters) in the Maximum Length field
-
Text: Open alpha-numeric text field. Agency Admin can set parameters for max characters allowed in the Maximum Length field.
-
Time: Allows user to enter a time in this field in HH:MM:SS AM/PM format or choose time from a Time Picker (using the clock icon)
-
Timestamp: Allows user to enter (or pick) Date and Time in separate fields. Date is entered in MM/DD/YYYY format. Time is entered in HH:MM:SS AM/PM format
-
-
-
Click Save.

-
In Administration > Masters > Custom Fields.
-
Click the Map Fields button.
-
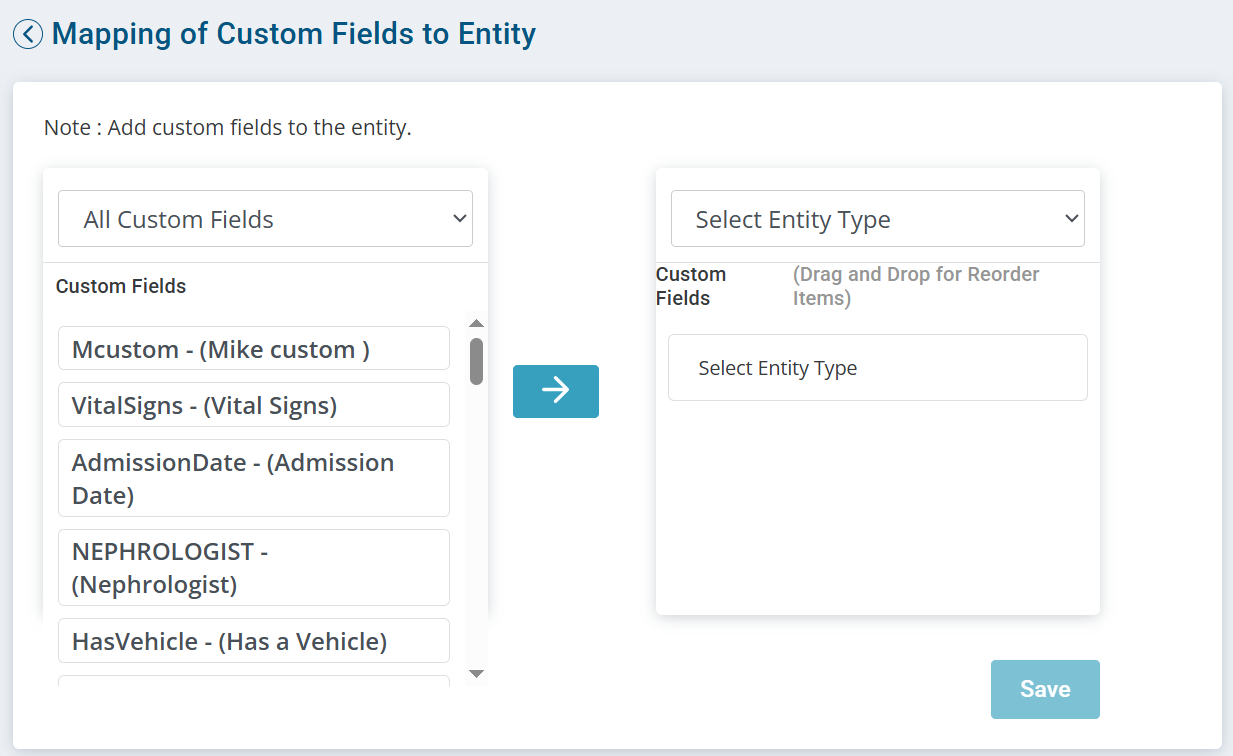
From the Mapping of Custom Fields to Entity window:
-
Select the field(s) from the Custom Fields list to add to the Additional Info tab.
-
Select Client or Employee from Select Entity Type dropdown and then click the Right Arrow button in the middle of the screen.
-
If applicable, drag and drop the Custom Fields to reorder the list.
-
Click Save.


