Masters Contracts Feature
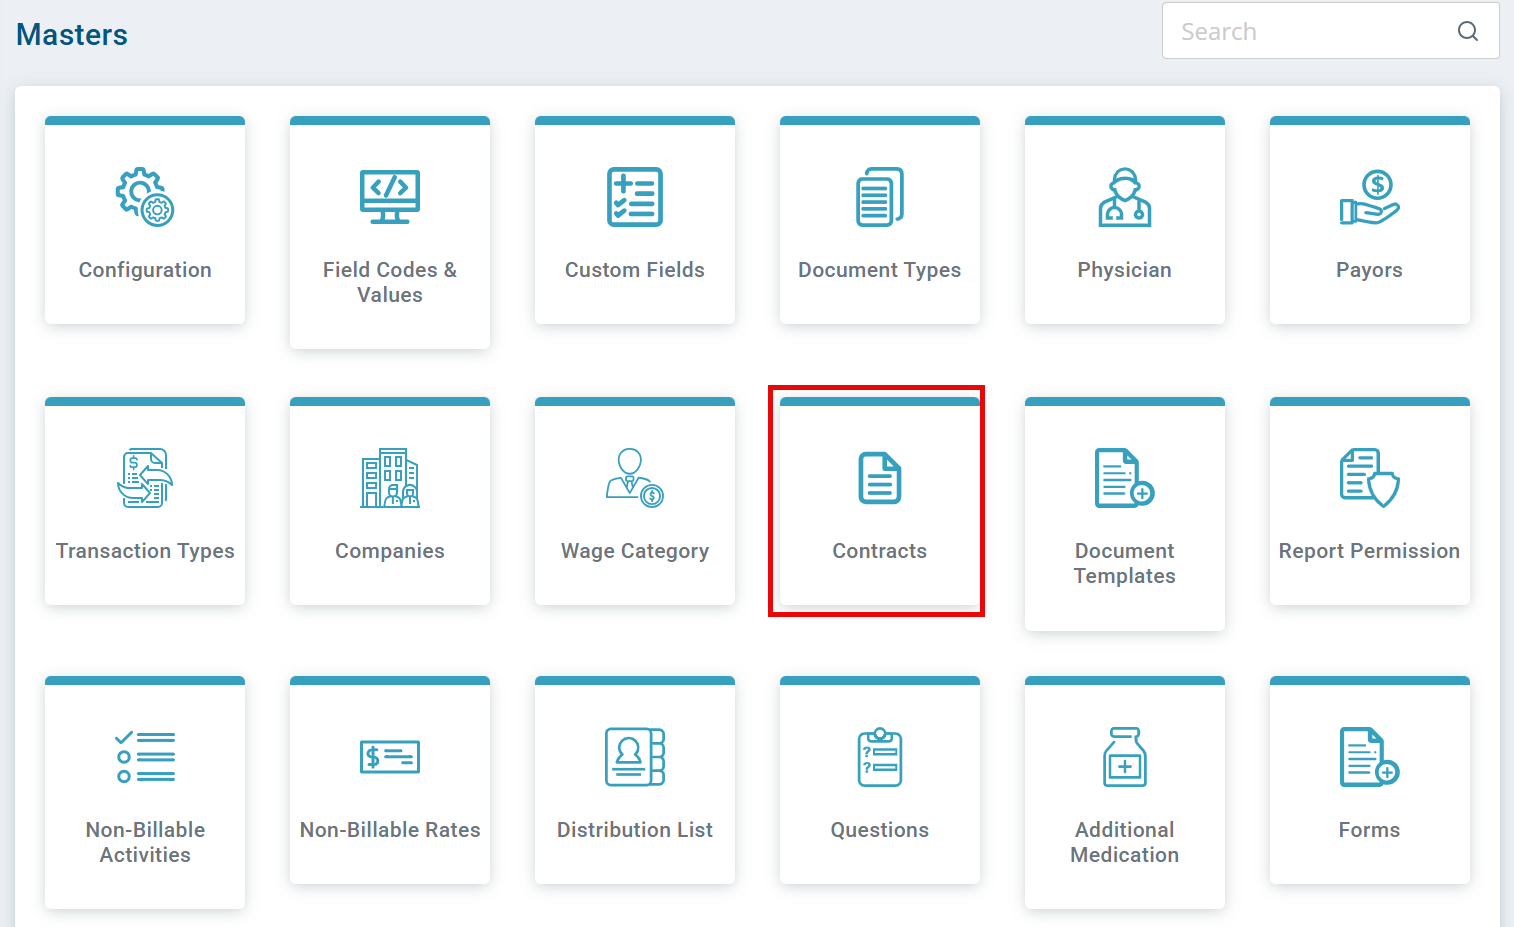
Keep track of contracts under Administration > Masters > Contracts. You can add a contract, filter, or adjust displayed columns.
The contract is based on the overall finished product. A company can have multiple contracts in Pavillio. Tasks are steps/processes that you have a time study for to get to a completed product. Contracts are what your DSPs select when clocking the individual into work.

-
Go to Administration > Masters > Contracts.
-
Click the Add Contract button.
-
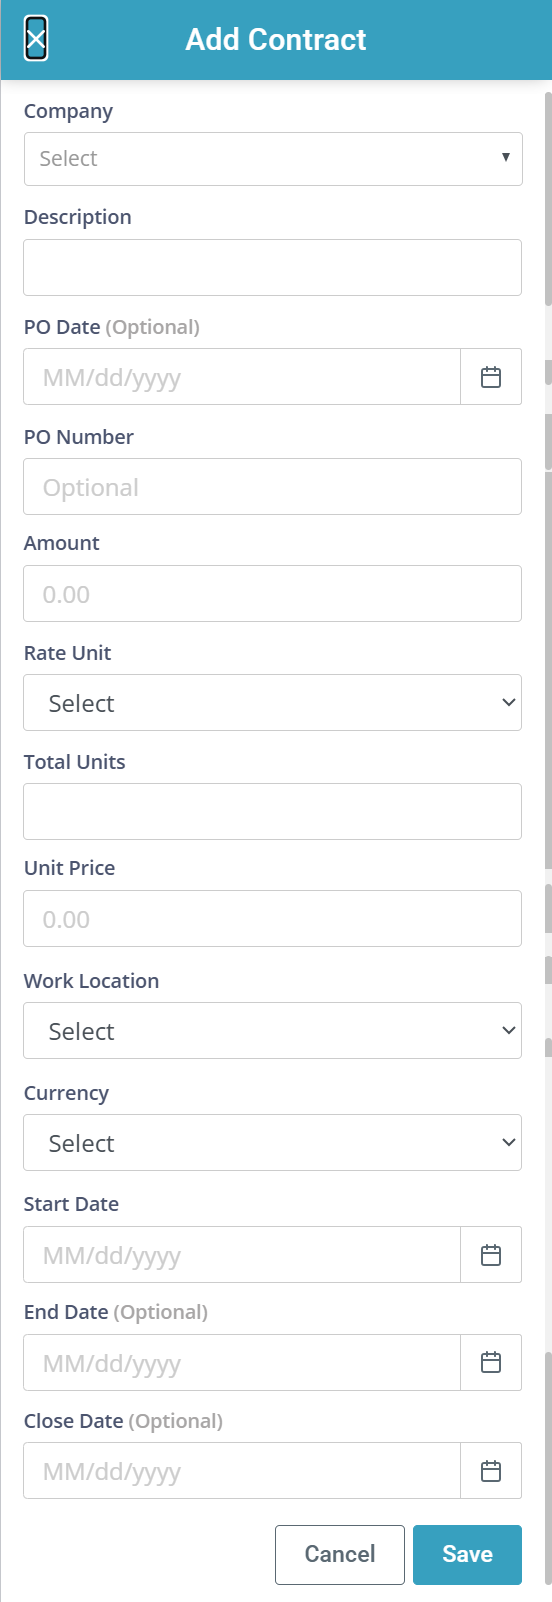
Complete the fields on the Add Contract window.
-
Select the Company from the dropdown. These companies were added in the previous step: Manage Companies.
-
Enter the Description. For example: Greeting Cards. Ensure that you use the terminology that your DSPs use on the floor for ease of adoption.
-
If applicable, enter the PO Date and PO Number.
-
Enter the Amount.
-
Select the Rate Unit from the dropdown.
-
Enter the Total Units.
-
Enter the Unit Price.
-
Select the Work Location from the dropdown. If the location doesn’t display, you need to set up a location on the Administration > Agency > Locations page, and the on the Mapped Tags tab.
This work location is what the DSPs select when clocking in and piece counts for this contract. If you use this contract at multiple locations, you need a contract setup for each location.
-
Select the Currency.
-
Enter a Start Date.
-
-
Click Save.

-
Go to Administration > Masters > Contracts.
-
Locate the contract and click the Ellipsis under the Actions column.
-
Select Make Inactive.
-
Complete the steps to Add a Contract. On the new contract, increase the unit price or units.

Ensure that the location, divisions, and departments are mapped as tags on Administration > Agency > Map Tags.
-
Go to Administration > Masters > Contracts.
-
Locate the contract and click the Ellipsis under the Actions column.
-
Select Add Task.
-
On the Tasks page, click the + Add Task button.
-
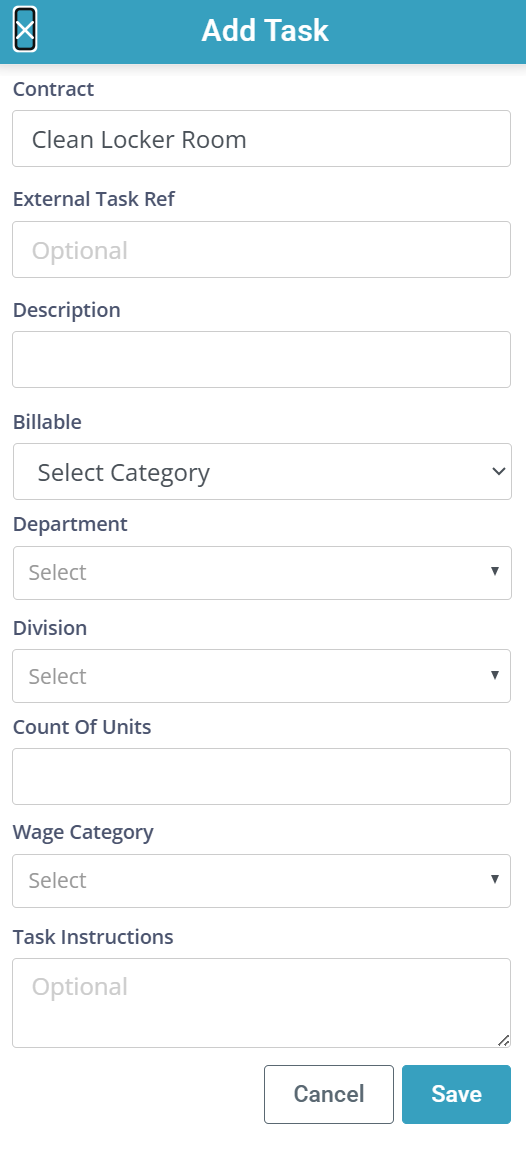
The Add Task window opens.
-
Enter a Description the DSPs recognizes when selecting the task the individual is working on. For example: Placing the card into the envelope.
-
Leave Billable set to No as you indicated the billable amount in the contract. If you are going to bill per task, you can change this to Yes.
-
Select the Department and Division. If the department and divisions do not populate in the dropdown, they need to be entered on Administration > Agency > Map Tags.
-
Enter the Count of Units. This can be a large number for ongoing contracts.
-
Select the Wage Category from the dropdown.
-
Enter the Standard Pieces Per Hour from your prevailing wage surveys.
-
Enter the Task Instructions from your prevailing wage survey for this step. It shows in the DSS Attendance > Tasks area for your DSPs to refer to.
-
-
Click the Save button. Repeat to add additional tasks.


