Add A New Care Document or Care Delivery Template
One of the great benefits of Pavillio is your ability to capture care-related information in the format that fits your agency needs. Pavillio has a compliant care document that is very flexible.
Be sure to have the document prepared that you are planning to build in Pavillio. You’ll use this to set up the attributes and questions to make your template creation a smooth process.
The Care Document is a dynamic document that can be completed electronically and can either be linked to a care period, care delivery or kept in a general area. The Care Delivery is associated with visit/attendance records, you can add activities, outcomes or caregiver questions to be completed during the visit and submitted with the time information. It is your responsibility to maintain templates that you create or clone. The Pavillio Admin maintains the Pavillio defined document templates.
However, if you provide Housing Stabilization Services or Skilled Services and want to have reportable answers to these questions such as indirect or direct, what is the temp of the individual; you need to add the questions created by Pavillio so the caregiver can answer the questions in the visit record, and you can run reports on these.
It is a best practice to clone a Pavillio Care Document or Care Delivery to add your statements or questions and remove those that you don’t want. An Attribute is a single word or item (like DOB), whereas a question is more in-depth. An attribute can't have punctuation, whereas a question can.

-
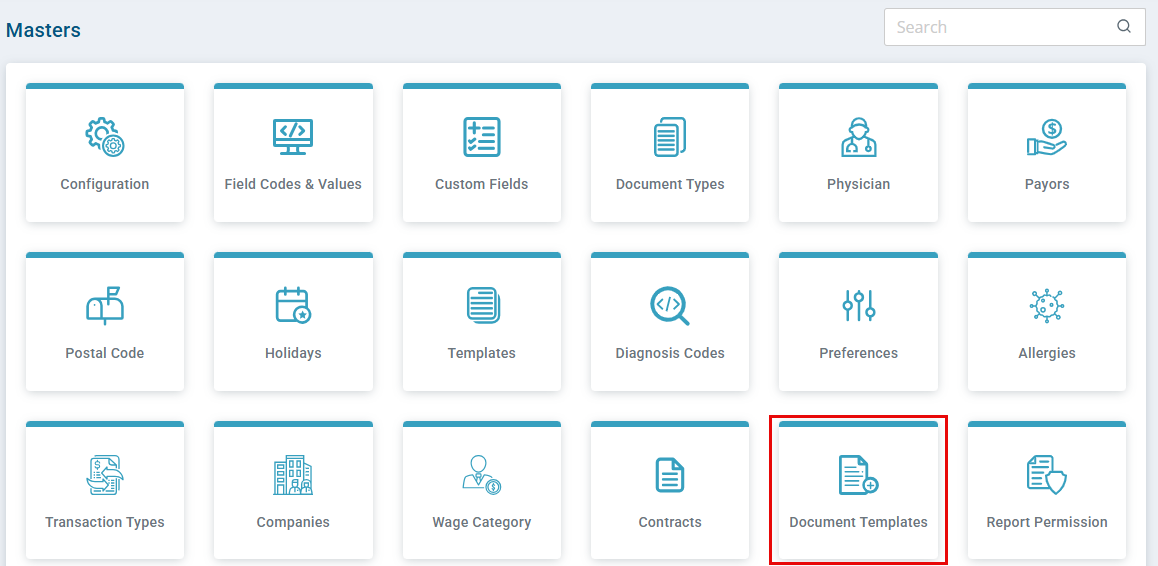
Go to Administration > Masters > Document Templates.
-
Locate the applicable template, under the Actions column click Clone.
-
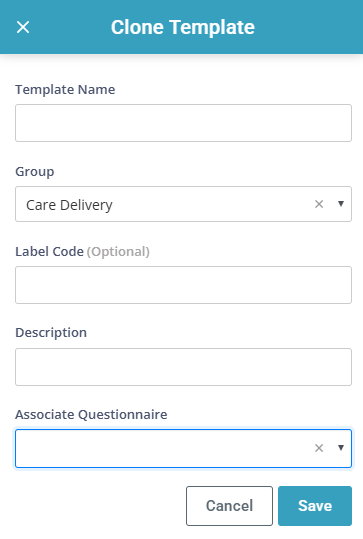
In the Clone Template window
-
Enter the new Template Name.
-
Select the Group type.
-
Care Delivery – Is associated with a plan of care linked to a Care Period.
-
General – Is associated with the Add Care Document feature.
-
-
Label Code – Is optional.
-
Description – Is the name of the care document or care delivery.
-
Associate Questionnaire – Select the questionnaire, if applicable.
-
-
Click Save.
-
Locate the applicable template, under the Actions column click Attributes to add or remove attributes or questions. See Add Attributes or Questions for steps.
-
Once you’ve finished building the template locate the applicable template, under the Actions column click Activate.
If you are replacing one of the Pavillio defined documents or care deliveries, under the Actions column click Inactivate.

The attributes Start Date, End Date, Notes, and Notes History are required as part of the Care Document. Without these attributes, the document will not save.
Name the document for selection in the Care tab > Add Care Document button.
-
Go to Administration > Masters > Document Templates.
-
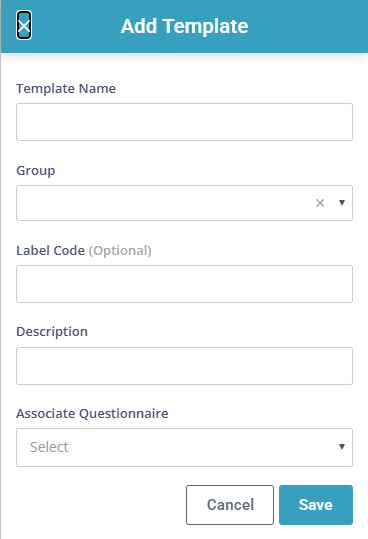
Click the Add Template button.
-
Template Name: Enter the name of the template with no spaces or special characters. This name is not seen by users.
-
Group: Select General.
-
Label Code (optional)
-
Description: The name appears for selection from the Add Care Document button.
-
-
Click Save.

-
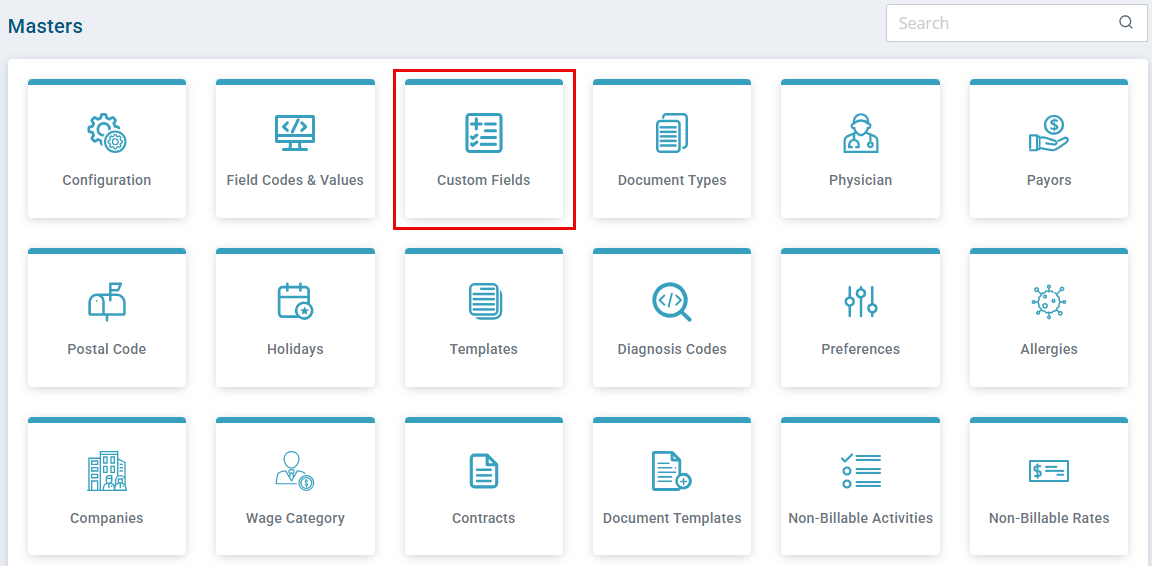
In Administration > Masters > Custom Fields
-
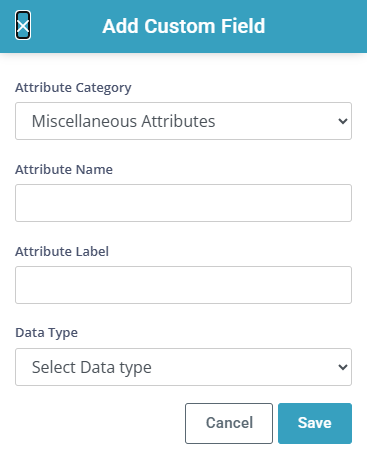
Click the Add Custom Field button.
-
In the Add Custom Field window.
-
Attribute Name (no special characters) – not seen by users.
-
Attribute Label – the name that appears in the form.
-
Data Type:
-
String – Text and numbers are accepted
-
Date – Date field
-
Boolean – True/false
-
Number – Only number value is accepted
-
-
-
Click Save.

-
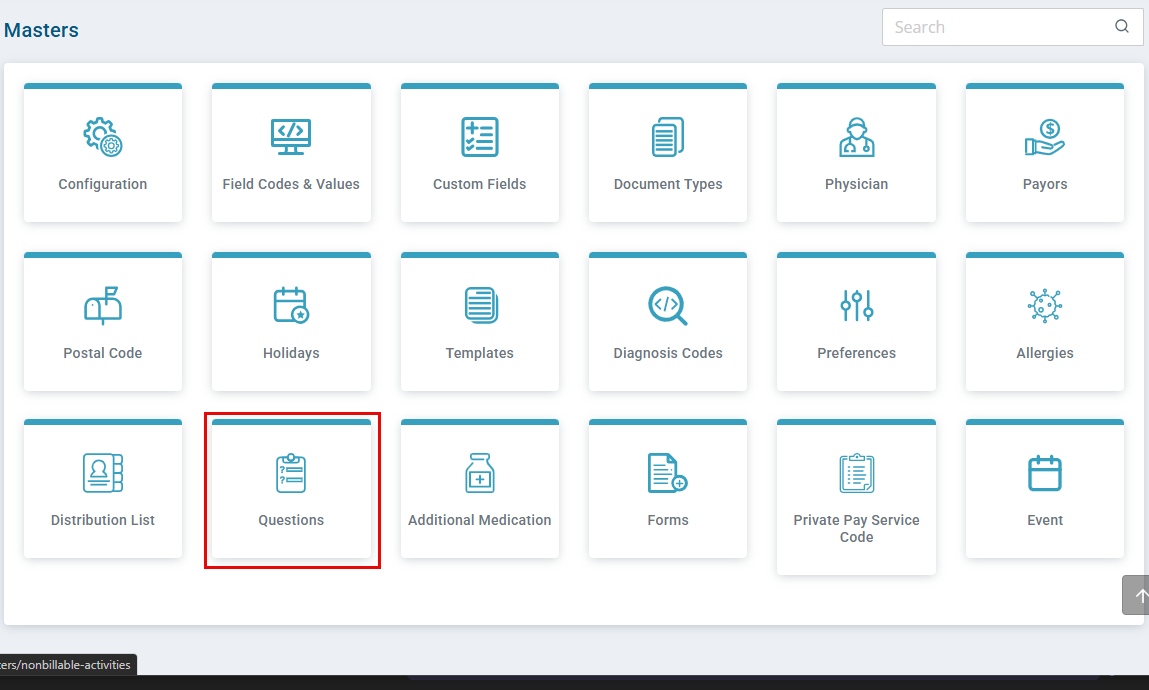
In Administration > Masters > Questions
-
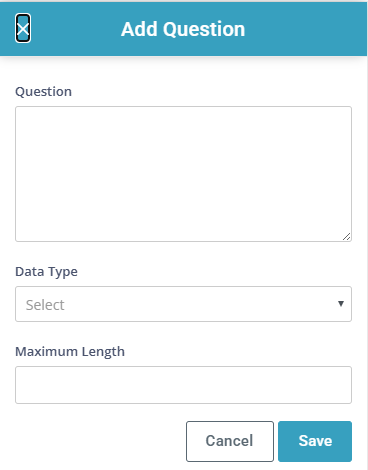
Click the Add Question button.
-
In the Questions window
-
Enter the question including punctuation.
-
Select the Data Type:
-
Code: Add a list of desired answers (use (i) for more information)
-
Date: Date field
-
Number: Only number value is accepted
-
String: Text and numbers are accepted
-
Text: Short answer
-
Base64 (should be used for signatures only)
-
-
Set your max length.
-
-
Click Save.

Once all attributes and questions are defined you add the attributes.
-
Go to Administration > Masters > Document Templates.
-
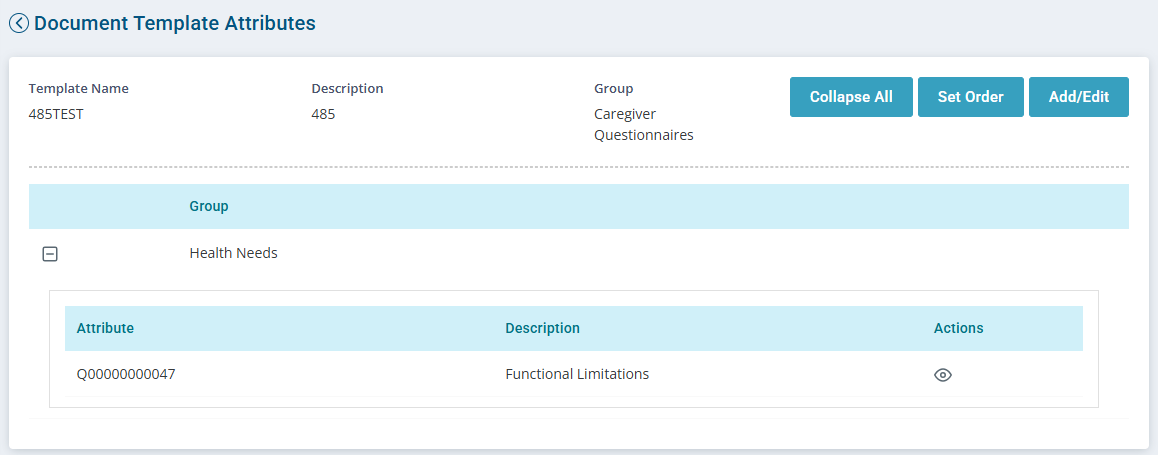
Locate the applicable template, under the Actions column click Attributes.
-
On the Document Template Attributes page, click the Add/Edit button.
-
Fields display to edit.
-
Attribute Type:
-
Attribute
-
Question
-
-
Attribute Category
-
General and Contact are most common. These and all other categories are defined by Pavillio and can be used but not altered.
-
Miscellaneous Attributes list the attributes you created in the previous steps.
-
-
Attribute Name - Select the attribute name.
Attribute names starting with CLI or AGY map data into these fields when the document is generated for a client.
-
Group - Select the Group you want to display your attribute in the form.
-
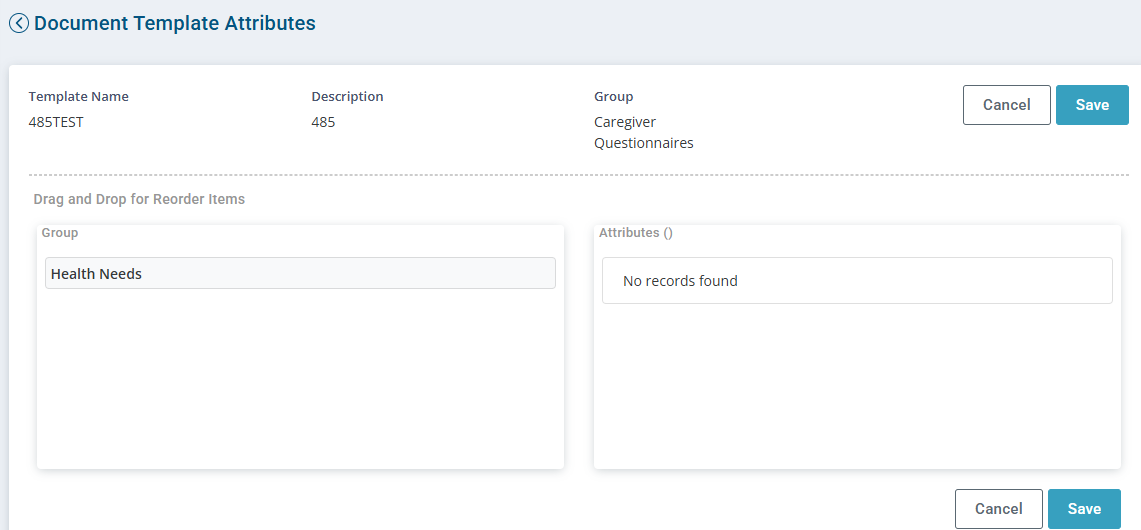
You can set the order of your attributes once the form is created by clicking Set Order > select the Group > grab the attribute and drop in your desired order. When finished, click Save.
-
If you want to add a custom group, go to Administration > Masters > Field Codes & Values > Template Attribute Groups > Add Field Value.
-
-
Optional - Select yes or no. Should be set to Yes when selecting widget type as label.
-
Read Only - Select Yes or No. Yes allows the attribute to be a statement only with no expected answer. Read Only should be set to Yes when selecting label as the UI Widget Type.
-
UI Widget Type – UI is the user interface that displays on the screen for the user.
-
List Box
-
Text Area
-
Signature Pad
-
Text Box
-
Drop Down
-
Label – Not a fillable field associated with the label just a statement.
-
-
-
Click Save.

-
Go to Administration > Masters > Document Templates.
-
Locate the applicable template, under the Actions column click Attributes.
-
Click the Set Order button.
-
Drag and drop items under Group and the Attributes section to set the order.
-
When finished click Save.
-
Once you’ve finished building the template locate the applicable template, under the Actions column click Activate.
If you are replacing one of the Pavillio defined documents or care deliveries, under the Actions column click Inactivate.
